When it comes to yoga and focusing on the breath, one cannot exist without the other. Yoga is designed to use the breath in various ways and for specific purposes. It makes sense that yoga can lend a hand to those that struggle with asthma. Asthma is a chronic lung condition of the airways. A person with asthma has a sensitive airway that becomes inflamed when exposed to triggers.
For example, an environmental trigger such as smoke. This makes breathing difficult and brings on coughing, wheezing, and even shortness of breath. Understandably, asthma sufferers are also prone to anxiety, stress, and even asthma attacks from such symptoms.
The severity of the condition varies from person to person and although asthma is incurable, there are ways to manage the symptoms. Read on to find how yoga and pranayama can bring relief to asthma sufferers!
The Benefits of Yoga Breathing Techniques
Yoga & the Parasympathetic Nervous System
To help us understand the impact of yoga and breathwork on the body here is just a little snippet about the nervous system.
In simple terms, your nervous system is your body’s very own “command centre.” The nervous system interprets stimuli from the world and then sends commands to specific parts of the body to respond to that stimuli.
The nervous system is made up of two parts. There is the central nervous system and the peripheral nervous system. The central nervous system is made up of the brain and spinal cord, and the peripheral nervous system is made up of the somatic and autonomic nervous systems. The somatic nervous system guides your voluntary movements and the autonomic nervous system controls your involuntary activities such as digestion and your heartbeat.
The Autonomic Nervous System has Two Branches
- The sympathetic nervous system (SNS)
- The parasympathetic nervous system (PNS)
When we sense a stressor, such as we see a dangerous animal, our sympathetic nervous system is activated and we have a “fight, flight or freeze '' response. Your heartbeat quickens pumping more blood to muscles, and survival bodily systems are prioritized. To make it clearer, if there is a perceived threat, digestive and reproductive system activities are not prioritized for survival but the cardiovascular system activities are.
After all, in a flight response, you need to run away which requires the cardiovascular system. The sympathetic nervous system response helps us survive and actions are geared toward escaping possible danger.
When the perceived threat has passed, then our PNS comes into play. Your heartbeat slows down, muscles can now relax, blood flow can increase to all bodily systems; you are in a “rest and digest '' state.
Both parts of the autonomic nervous system are important and have their respective specific purpose. However, these days stressors can be a traffic jam before work, your boss yelling at you, deadlines, or strained familial relationships. These perceived threats can activate our sympathetic nervous system and keep us in a stressed state. Over a period of time, this chronic stress can have a serious negative impact on your health and well-being.
Let’s look at the part of the nervous system that yoga can have a positive impact on. If you have surmised that it’s the parasympathetic nervous system, you are right! Yoga and breathwork can help us move into the parasympathetic nervous system so that the body can repair itself and the mind can rest after being exposed and having responded to stressors.
Yoga Breathing and the Respiratory System
Proper oxygenation of your cells is another important aspect of good health. Cells need oxygen to generate energy. To get enough oxygen to your cells, you must improve the blood’s absorption of oxygen. Research has shown that deep breathing into the lower part of the lungs increases this oxygen absorption. This in turn is beneficial because, even with fewer inhalations per minute, the blood receives more oxygen.
The blood then is able to better supply oxygen to all tissues of your body. A study on yoga practitioners showed that they adapted better to lower oxygen levels due to high altitude than did the control group, which did not practice yoga. The deep and conscious breathing that is typical in yoga seems to aid efficient ventilation: the amount of oxygen reaching the heart per minute.
The respiratory system is quite incredible. It is made up of organs and tissue functionally structured and designed for the fundamental live-giving activity of breathing. This system brings oxygen into our bodies and sends carbon dioxide out.
There are Three Major Parts of the Respiratory System
- The airway (made up of the nose, mouth, pharynx, larynx, trachea, bronchi, and bronchioles)
- The lungs
- The muscles of respiration (intercostal muscles, diaphragm)
Through the respiratory system, our body receives oxygen-rich air so that cells can function optimally. The air enters the mouth and nose and then moves down the trachea into the lungs. The diaphragm is actually a muscle we use to inhale (breathe in) and exhale (breathe out). It is located just below the lungs. Maybe you have heard of diaphragmatic breathing or the yoga breathing technique called “belly breathing.”
There are yoga breathing techniques known as pranayama. When performed consistently and correctly, pranayama has many benefits for the body and mind. In an interesting study, just an 8-week yoga intervention that targeted healthy yet inactive middle-aged people found that there was an overall improvement in respiratory and physical functions. The inclusion of pranayama had the added benefit of improving inspiratory muscle strength and flexibility.
Consistent and safe yoga practice increases blood flow and levels of hemoglobin and red blood cells which allows for more oxygen to reach the body cells, enhancing their function. Twisting poses wring out venous blood from internal organs allowing oxygenated blood to flow in when the twist is released.
Inverted poses encourage venous blood flow from the legs and pelvis back to the heart and then pumped through the lungs where it becomes freshly oxygenated. pranayama allows for fuller deeper breathing and an increased level of oxygen in the blood which contributes to better health.
Yoga and Breathwork to Reduce Asthma Symptoms
Yoga Breathing Techniques for Asthma
A consistent and safe practice of yoga asanas and yoga breathing methods can help alleviate asthma symptoms. This can have a positive impact on the daily lives of asthma sufferers. Common in asthma sufferers is the stress and anxiety that result from symptoms.
Sometimes, asthma sufferers may even experience hyperventilation during an asthma attack. Practising yoga breathing techniques that stimulate the vagus nerve can help induce calm after an asthma attack. The vagus nerve is the major component of the parasympathetic nervous system. It oversees a list of integral bodily functions such as immune responses, digestive processes, and heart rate.
When you stimulate the vagus nerve via calming yoga breathing methods, you send a message that you are safe and ready for relaxation. This is especially helpful if an asthma sufferer starts experiencing symptoms such as shortness of breath. Slow belly breathing can have calm-inducing benefits as it activates the parasympathetic nervous system.
By activating the PNS, you increase your vagal tone. Your vagal tone determines the timing in which your body takes to relax after a stress response. Your vagal tone can be improved through the practice of safe and appropriate pranayama.
The Power of Linking Breath to Movement
In yoga, the intentional practice of linking breath to movement acts as a tool to activate the parasympathetic nervous system. Using the breath, with purpose and knowledge of how to do so safely, allows us to slow down the breath and use it to get into a rhythm of movement.
Our heartbeat slows down and we can bring ourselves back to the present time. In the present time, we can signal to the body that there is no perceived threat and this can dissipate the stress response which means that stress hormones like cortisol entering the bloodstream are stopped.
Get a free copy of our Amazon bestselling book directly into your inbox!
Learn how to practice, modify and sequence 250+ yoga postures according to ancient Hatha Yoga principles.
Using the Breath in Yoga: Inhalation, Retention, and Exhalation
Pranayama includes various yoga breathing techniques, each with a specific purpose. A study on the effect of pranayama in patients with bronchial asthma used various yoga breathing methods.
- Deep breathing (deep inspiration and deep expiration): The subjects sat in Sukhasana and performed deep inspiration(inhalation) and expiration(exhalation) through both nostrils.
- Shashankasana breathing: The subjects sat in Vajrasana with their hands back, holding the right wrist with the left arm, with inhalation the person bent backward and with exhalation and bent forwards touching the forehead toward the ground.
- Bhramari chanting: The subjects sat in Sukhasana inhaling through both nostrils and while exhaling produced the sound of a humming bee.
The results supported the guided and safe use of pranayama in the case of asthma sufferers. It was found that exercises which focus on exhalation are helpful. In bronchial asthma expiration is difficult, so exercises that support expiration can be beneficial; however, this must be done with caution and consulting one’s doctor first.
Three Breath-work Exercises to Help Alleviate Asthma Symptoms
Diaphragmatic Breathing (aka Belly breathing)
- Sit or lie flat in a comfortable position
- Put one hand on your belly just below your ribs and the other hand on your chest.
- Take a deep breath in through your nose, and let your belly gently and slowly push your hand out. Try to breathe in such a way that your chest doesn’t move, only your belly moves.
- Breathe out through pursed lips as if you were whistling
- Do this breathing 3 to 10 times
Shashankasana Breathing
- Sit in Vajrasana with hands on the thighs
- The upper body is upright and relaxed
- Inhaling through your nose, raise both arms above the head
- While exhaling through your nose, fold forward
- The arms, trunk, and head move together and remain aligned.
- The forehead and arms should rest on the floor in front of the knees or on appropriate props
- The buttocks remain on the heels (or on a block/ cushion placed between your calves)
- Breathing calmly through your nose, remain in this position for a few breaths
- Relax the whole body, especially the shoulders, neck, and back.
- Take a deep breath in through your nose and, without rounding the spine, raise the upper body and arms.
- Exhaling through your nose, return to the starting position.
Bhramari Chanting
- Sit comfortably with your eyes closed.
- Place your index fingers on your ears. There is cartilage between your cheek and ear. Place your index fingers on the cartilage.
- Take a deep breath in through your nose and as you breathe out, gently press the cartilage. You can keep the cartilage pressed or press it in and out with your fingers while making a loud humming sound like a bee. You can also make a low-pitched sound or a high-pitched one depending on what feels comfortable to you
- Breathe in again and continue the same pattern three to four times.
Five Yoga Asanas to Help Alleviate Asthma Symptoms
Ardha Setu Bandhasana - Half Bridge Pose
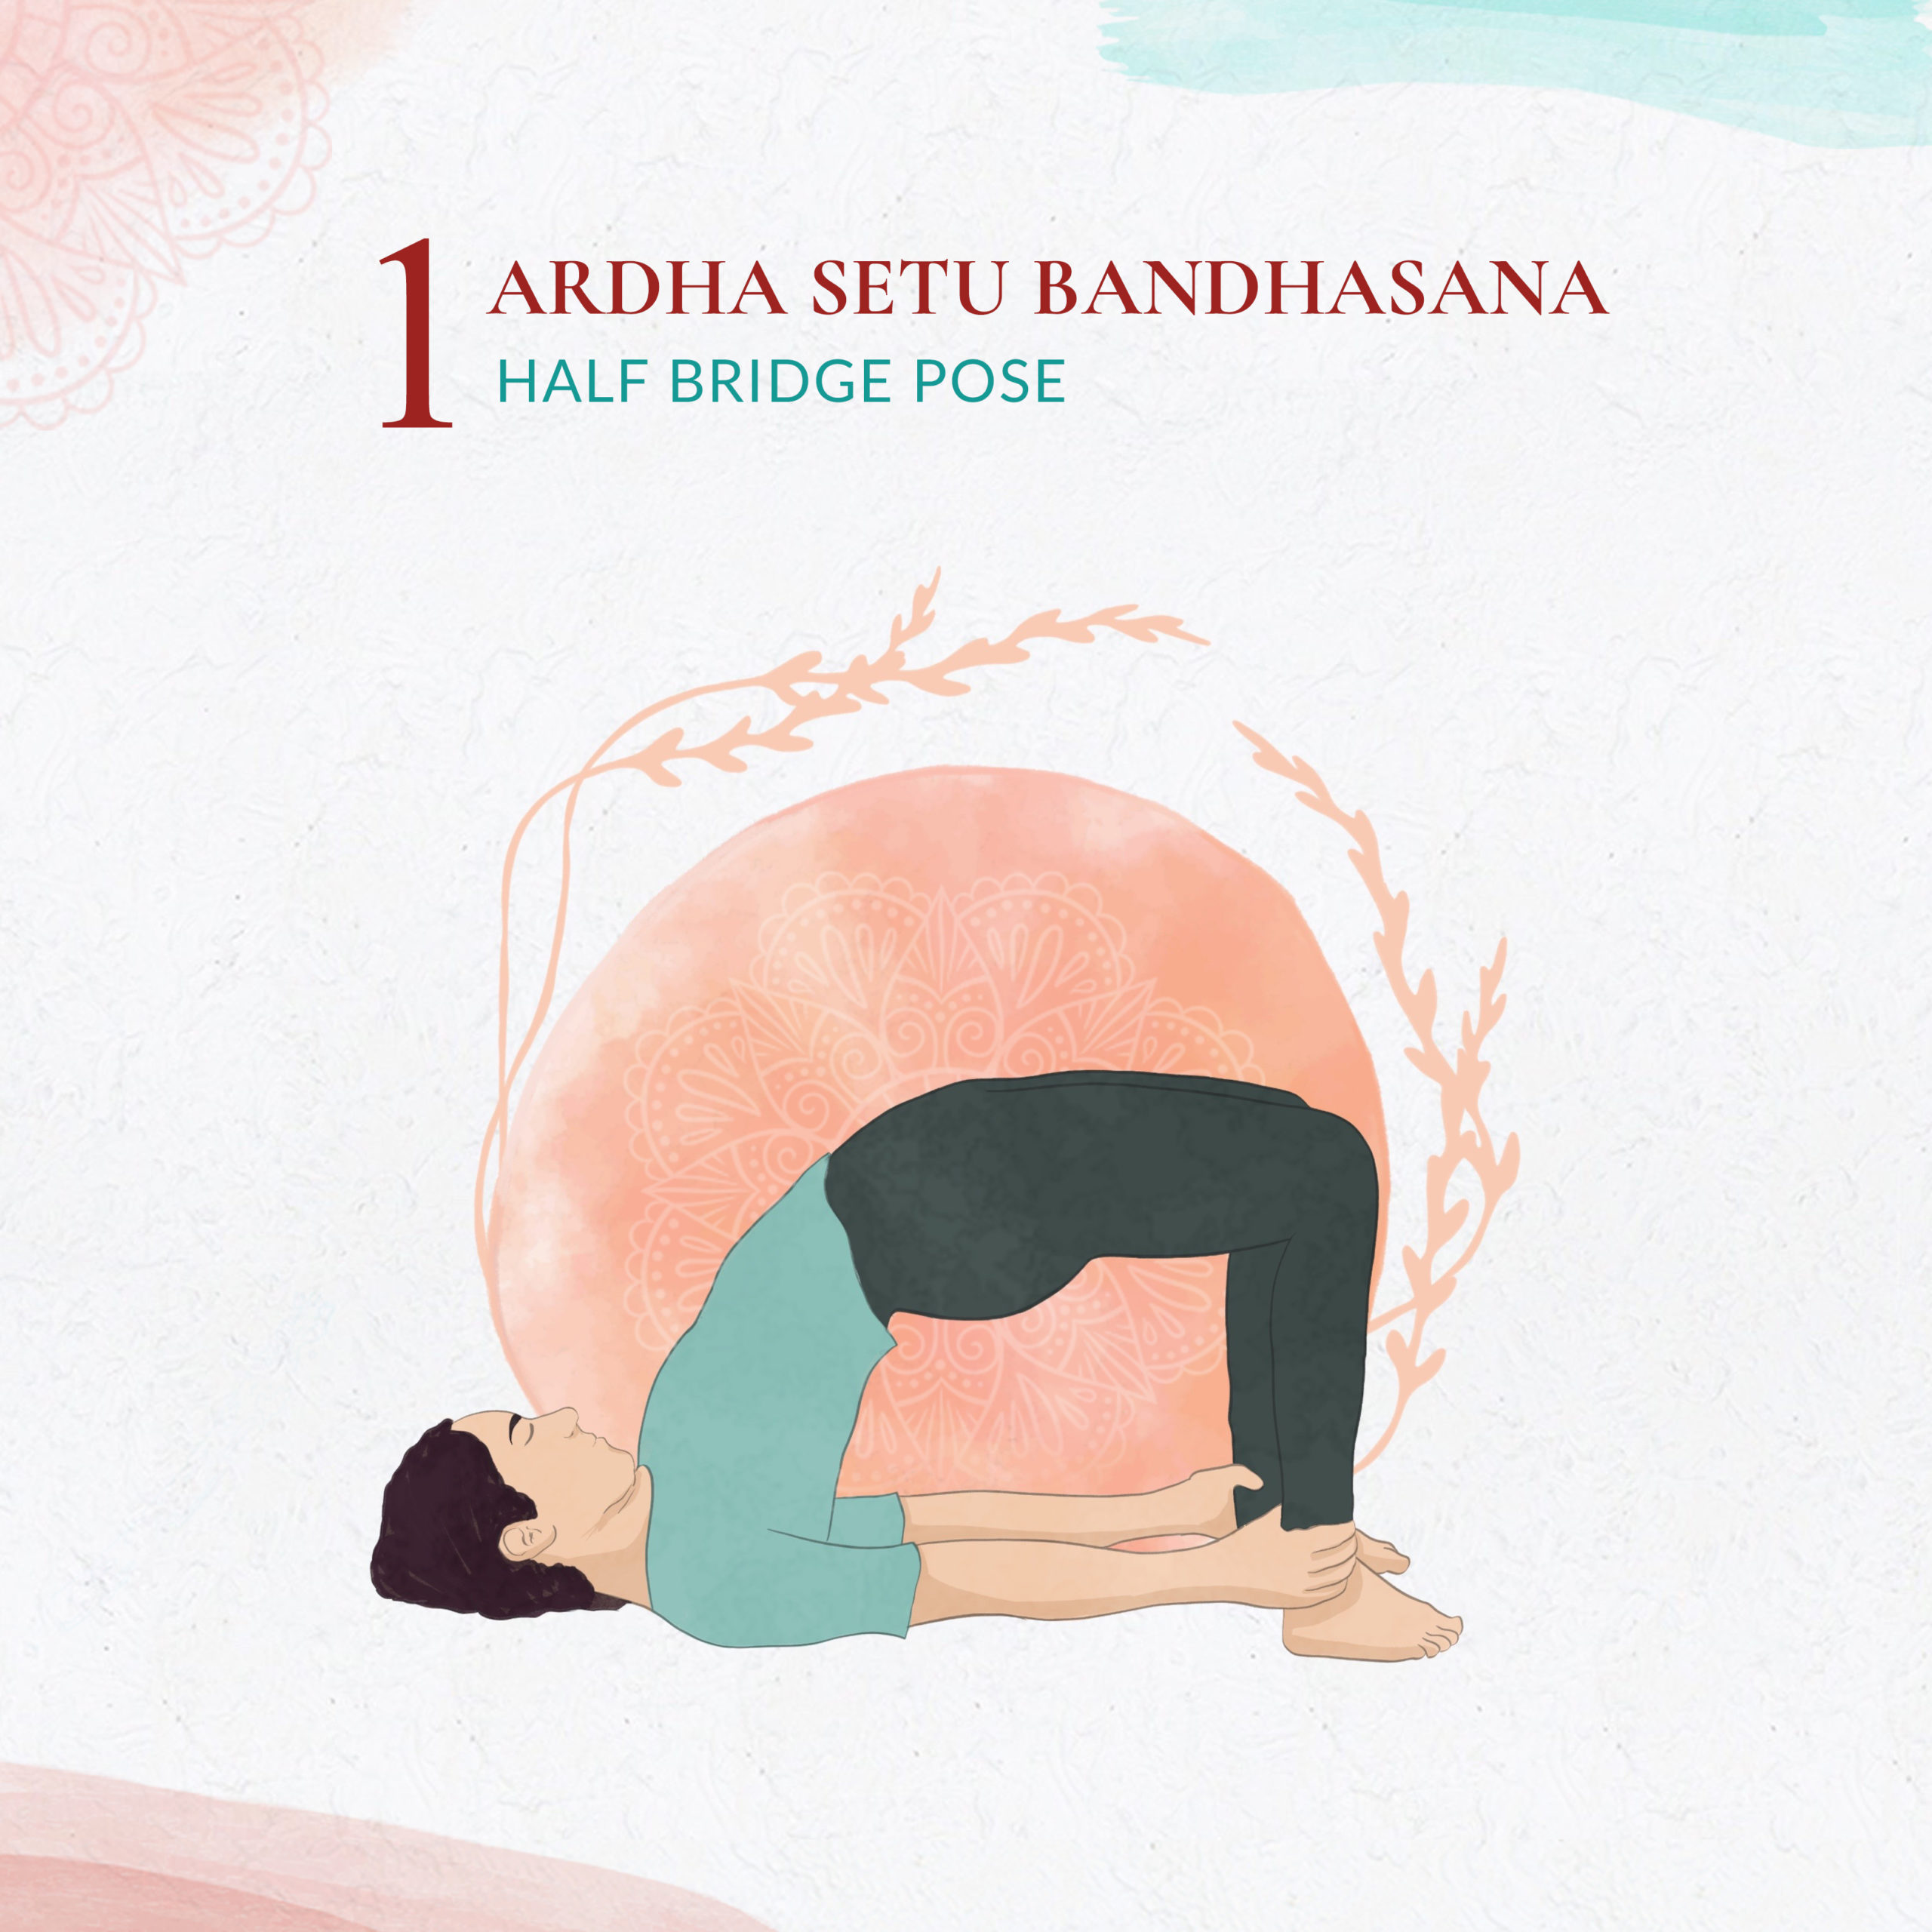
This pose can help open up the chest. This is a great pose as there are no general contraindications and cautions. However, respect your limit of movement and do not push further than that, as that can cause strain in your neck or knees. If you cannot hold your ankles while maintaining the correct alignment, you can also keep your palms flat on the floor, next to your thighs, and then push your pelvis up as high as you can. Please support your back by bringing your hands in the same position as in Shoulderstand (fingers pointing in toward your spine and thumbs up alongside your body).
- Lie down on your back, bend your knees, and bring your feet close to your hips.
- Keep your feet hip-width apart and heels on the floor.
- Place your hands by your sides, palms facing downward.
- Breathe in, push your hands into the floor, and slowly lift your hips up to the ceiling.
- Reach with your hands toward your ankles and bring your chest toward your chin.
- Keep lifting your pelvis upward and back toward your head, and breathe evenly.
- It is best to keep your shoulders and head on the floor and draw your shoulder blades toward each other. Your knees should stay parallel, toes may point slightly outwards.
- Your knees and ankles should be at a 90-degree angle to the floor.
Place your palms flat on the floor and vertebrae by vertebrae roll the back down toward the floor.
Vistrit Bhujangasana - Extended Cobra Pose
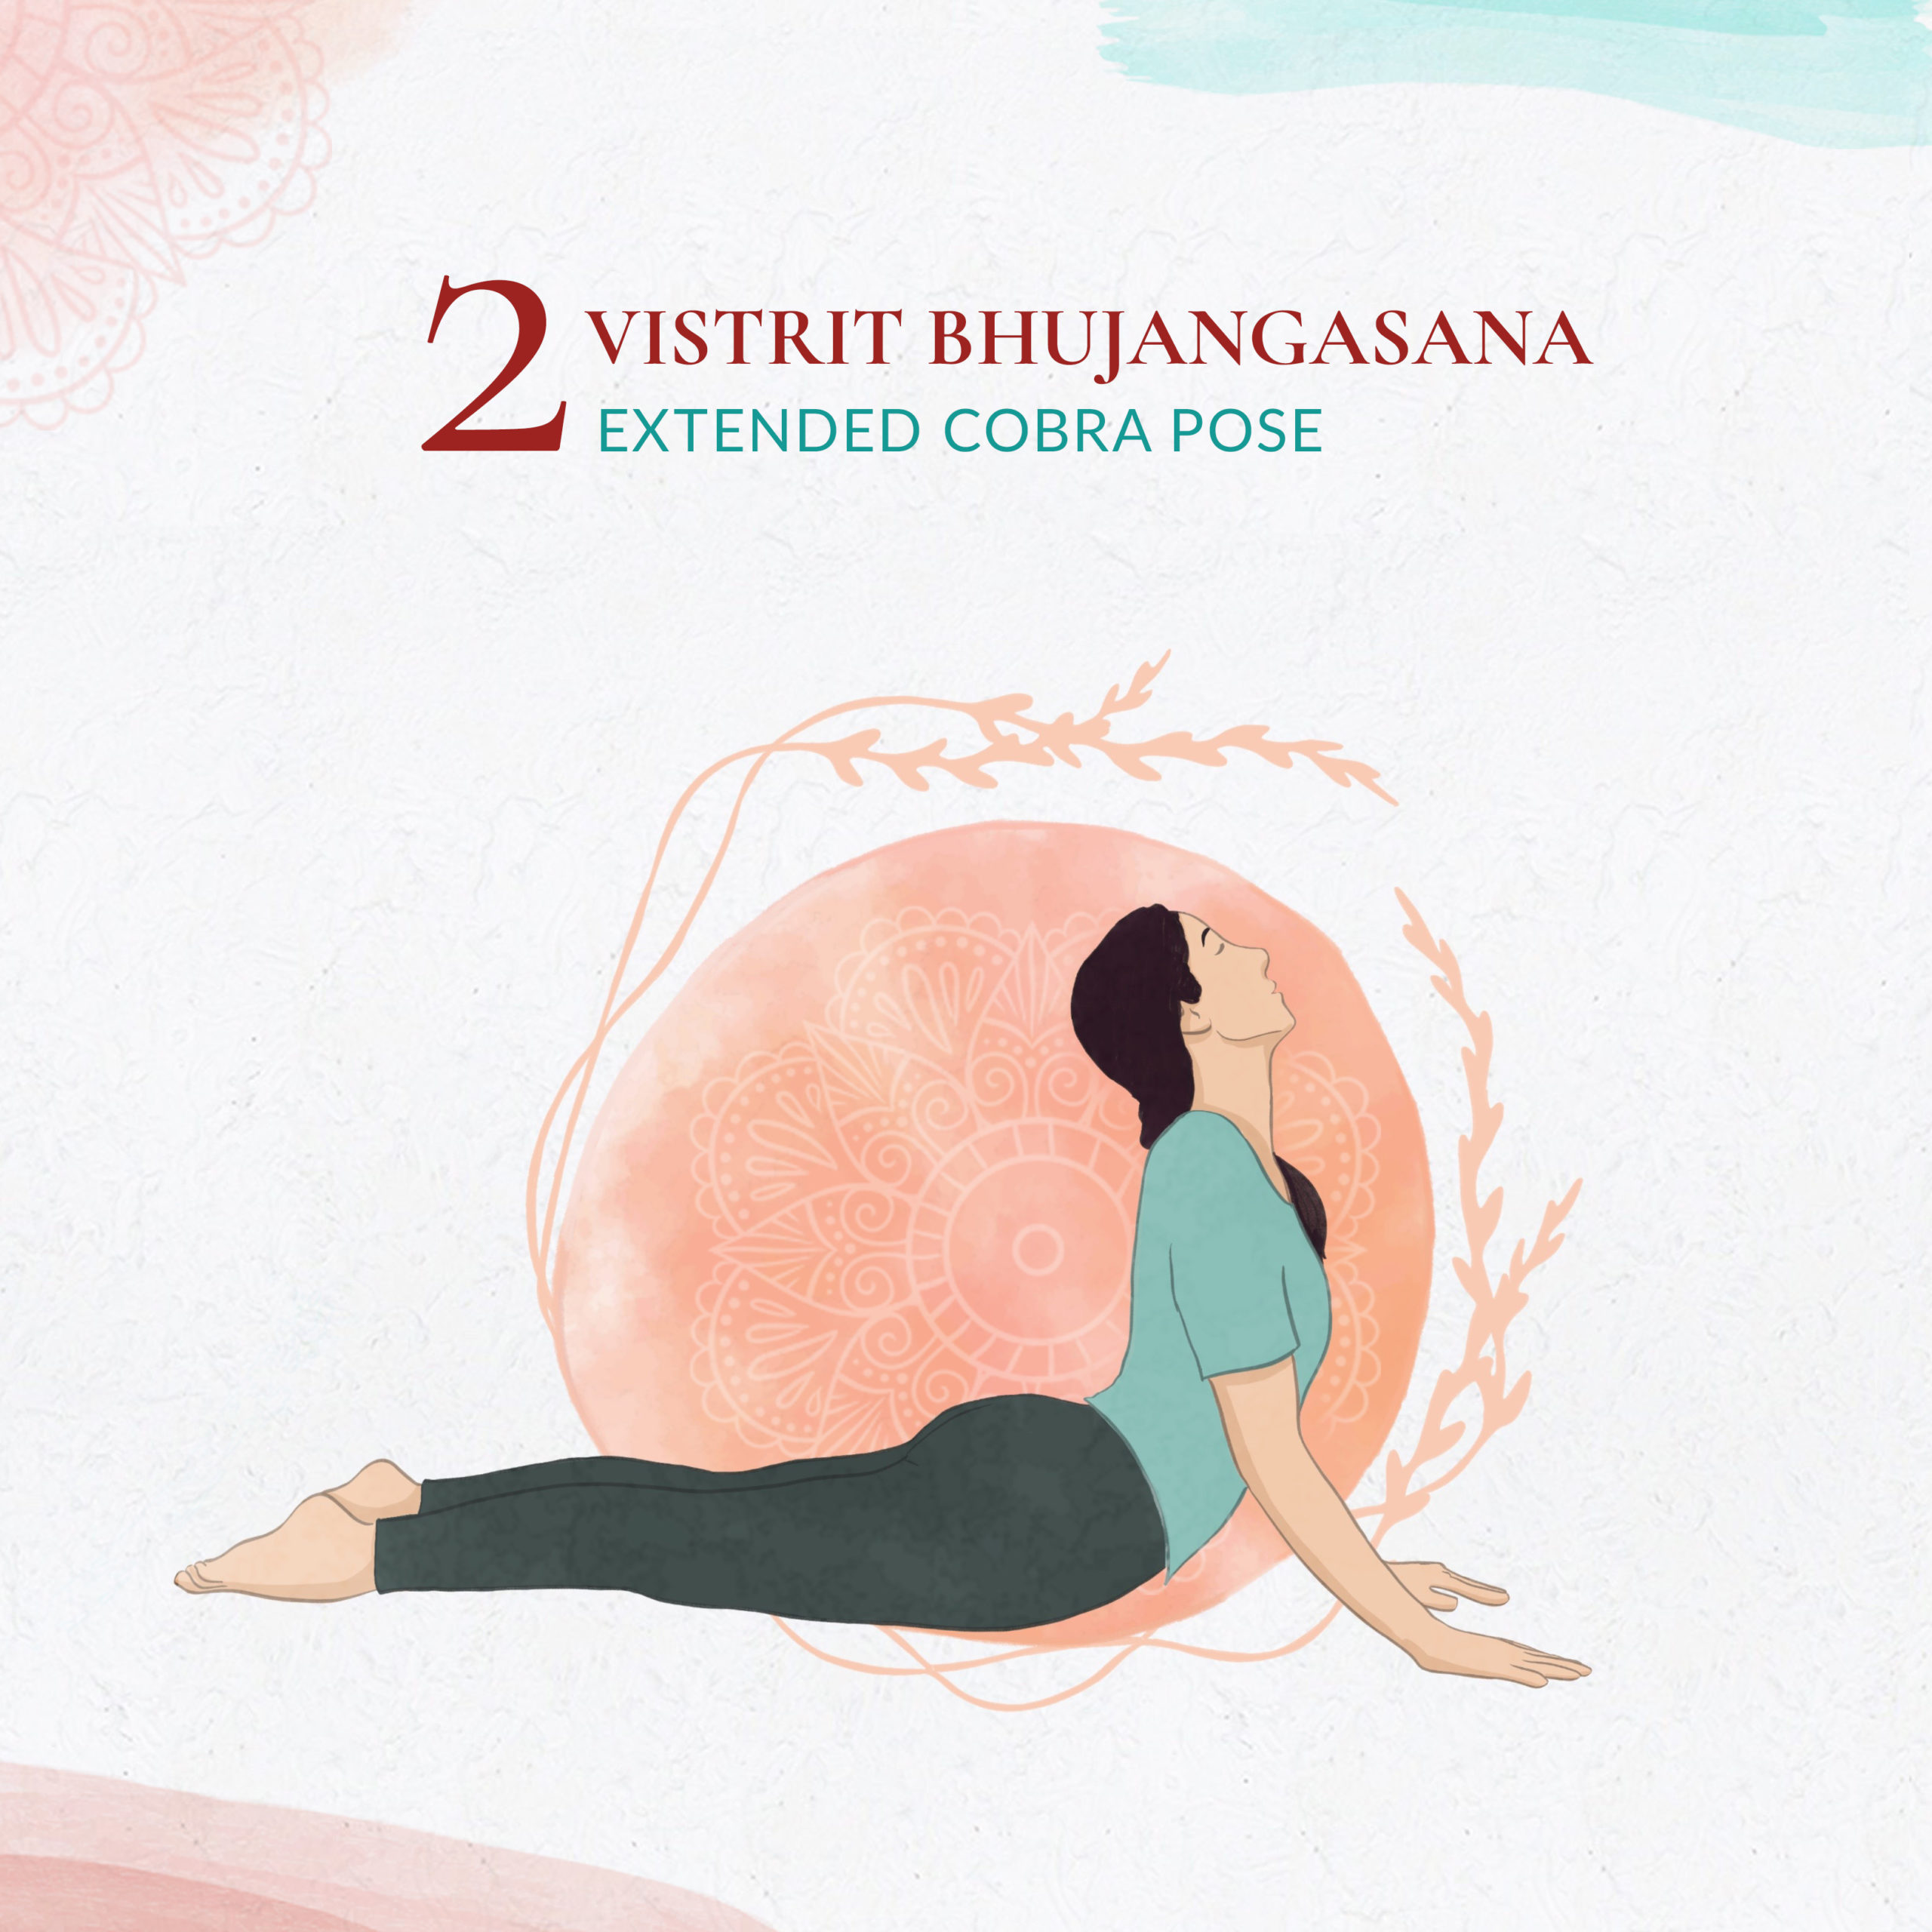
This pose stretches the front of your torso and helps you breathe more deeply.
- Lie down on your stomach with your forehead on the floor and your hands next to your chest.
- Legs are hip-width or shoulder-width apart.
- Breathe in, pushing your hands against the floor, and reach forward and up with your torso.
- Lift your entire torso as far off the floor as possible, while keeping the front of your pelvis firmly on the floor.
- Bring your entire spine into a backward arch by firmly pressing your hands against the floor.
- Look diagonally up or even up and back, keeping your neck elongated.
- Hold the pose steadily as long as comfortable and breathe evenly.
- To release the pose, lead with your sternum forward and out and gently lower your upper body downward.
Depending on the flexibility of your spine, you need to keep your arms bent. The more your arms are bent, the heavier it feels. If it becomes too heavy, you can walk your hands forward so that your elbows straighten out more. But make sure not to allow your shoulders to lift up to your ears. If you suffer from lower-back issues, backbends often are allowed and even advised. However, make sure to not push yourself to your full movement capacity, but rather stay at around 70 percent of your flexibility. For extra support and stability, keep your core active, by pulling your belly button in toward your spine.
Your arms are not locked but slightly bent, with your elbows hugging the side of your torso. Your pubic bone and thighs stay firmly on the floor and your shoulders blades are drawn down toward your waist. Remember, our neck is an extension of your spine so refrain from dropping your head back. Depending on your flexibility you are either looking forward, diagonally upward or up and
Jathara Parivartanasana - Supine Spinal Twist
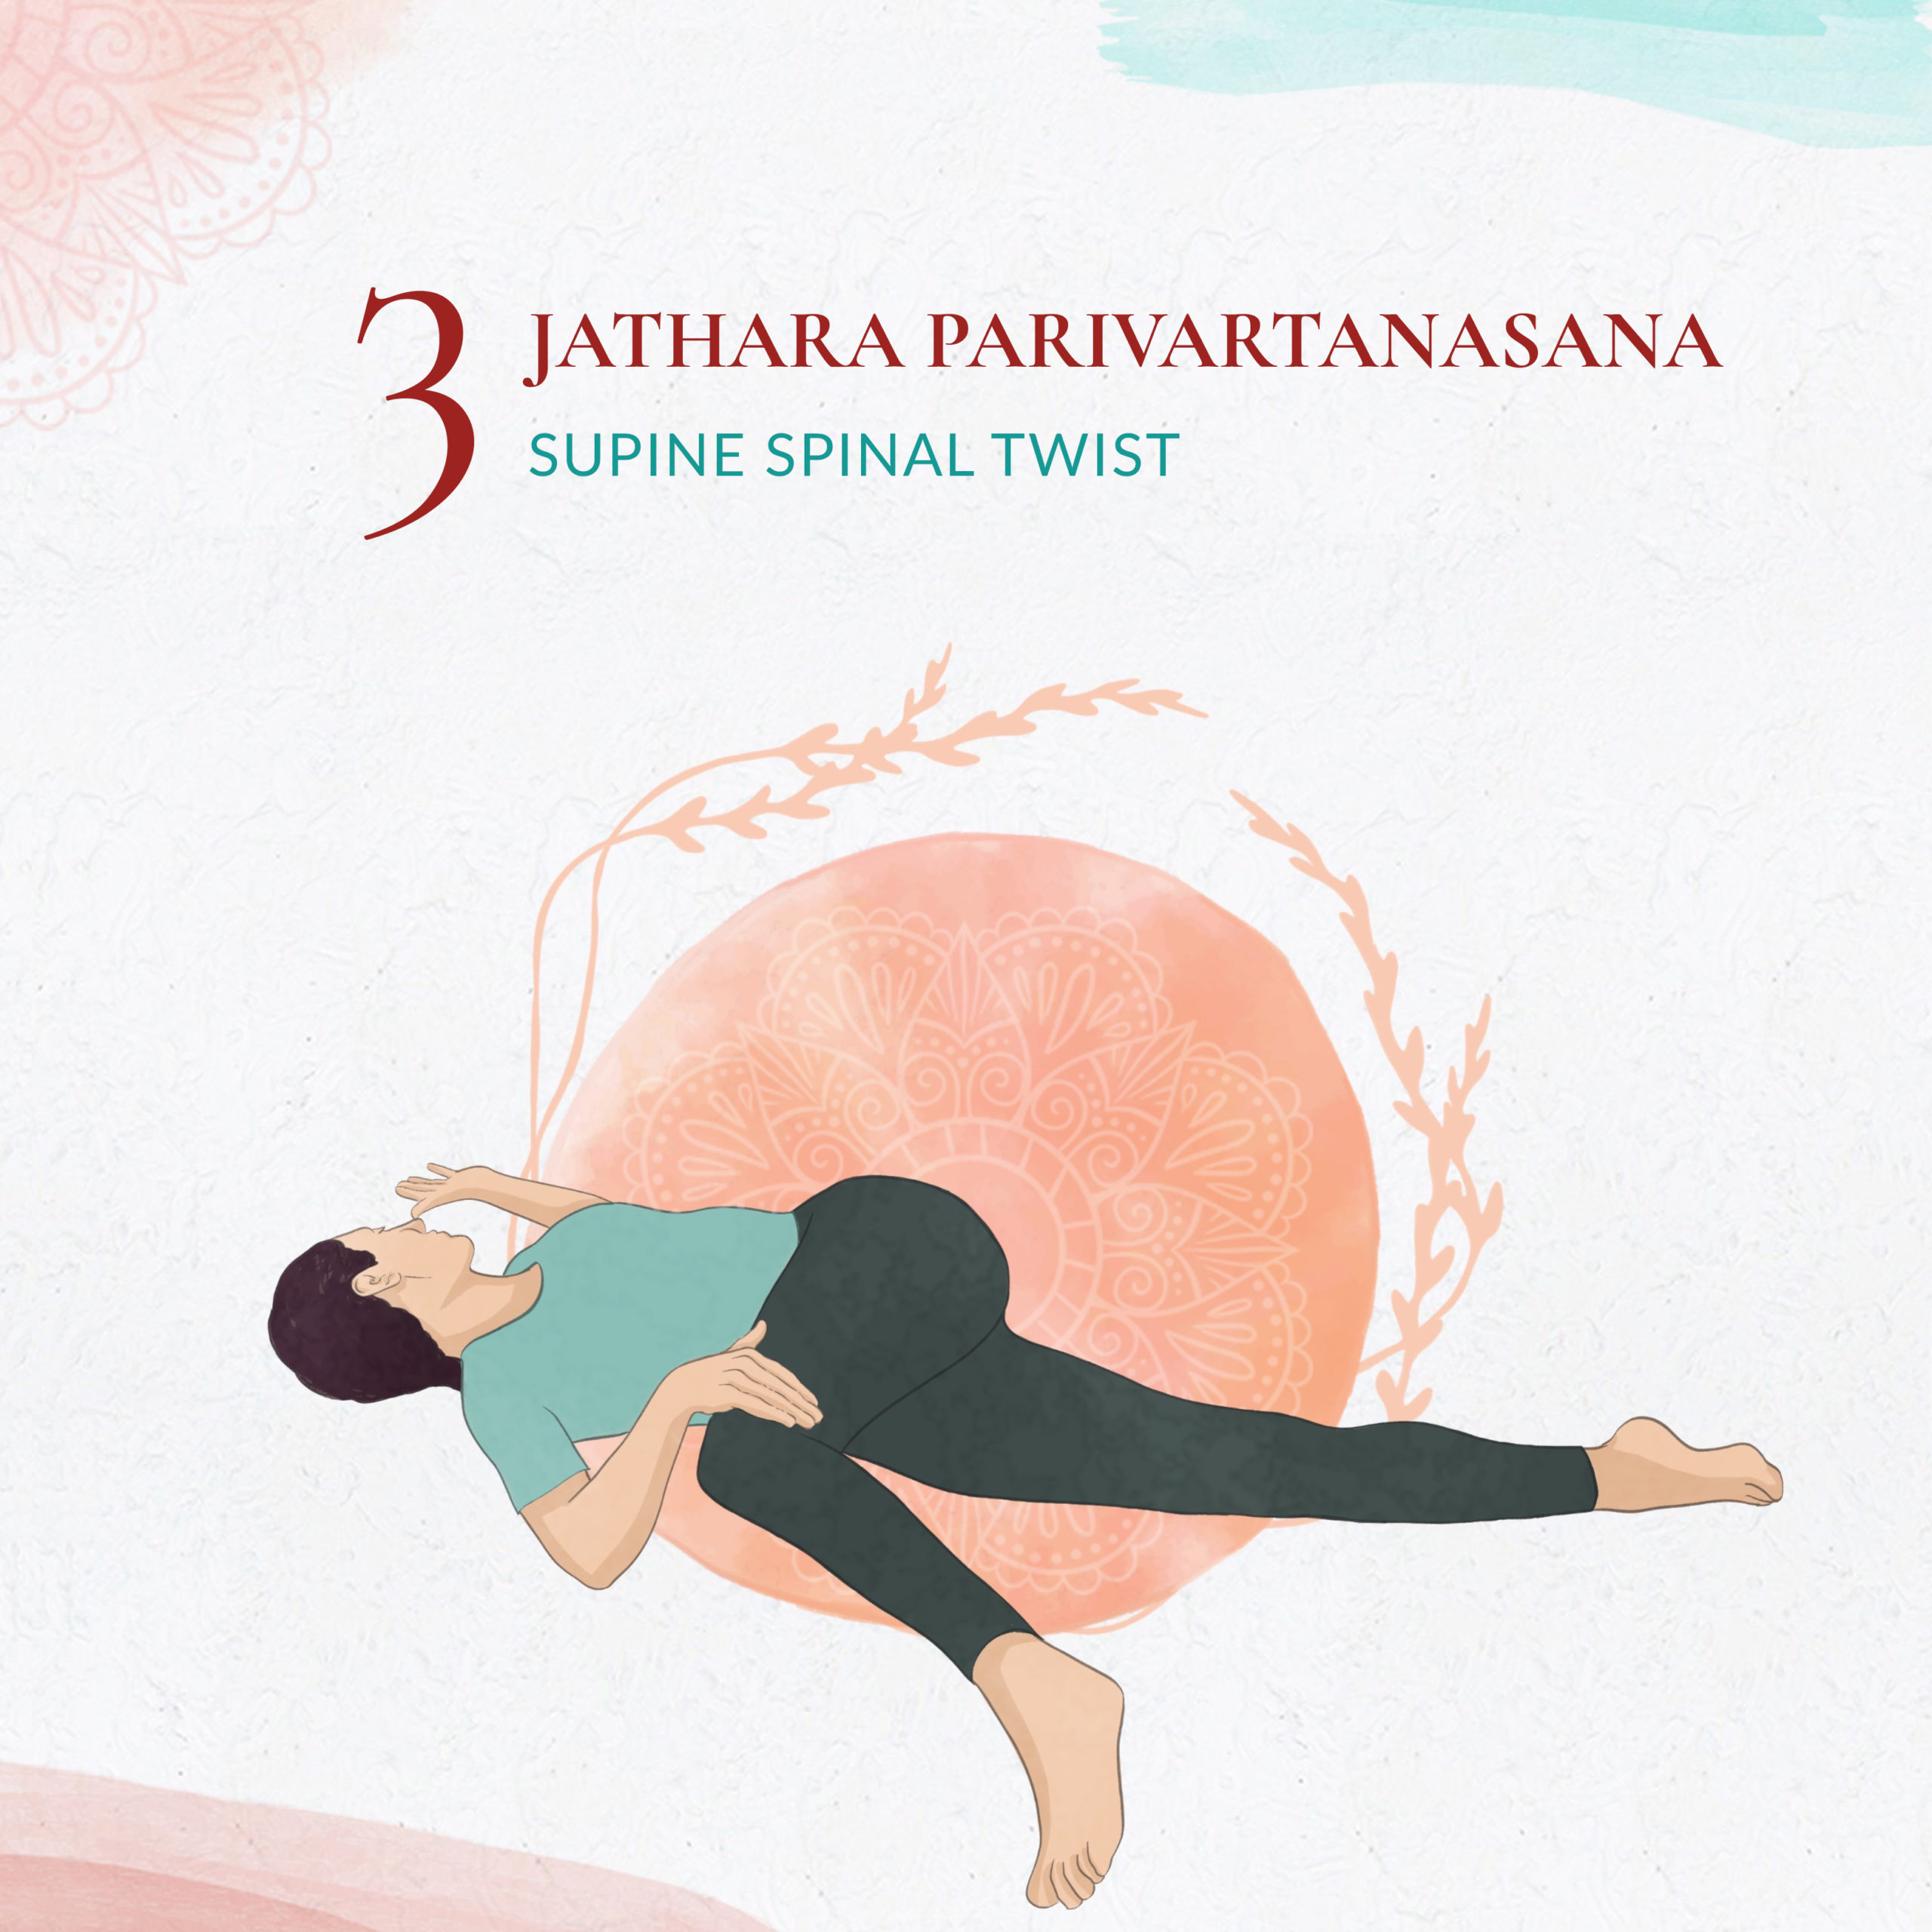
This pose can help you find more space and relaxation in your abdomen and lower back to encourage deeper breathing.
- Lie on your back, with your legs together and your arms at a 90-degree angle from your body, palms facing upward. Lift your left knee to your chest and drop it to your right, until your left foot is resting on the floor.
- Place your right hand on your left knee, look over your left shoulder, and with every breath focus on releasing your left knee toward the floor while pressing your left shoulder blade toward the floor.
- Hold the pose steadily as long as comfortable and breathe evenly.
- To come out of the pose, slide your left foot over the floor to join your right and allow your body to roll back into a supine position.
- Then repeat on the other side.
This is quite a restorative and gentle pose in general. It is a good alternative for those for whom seated twists are not recommended.
To decrease the intensity of the twist, you can place a bolster or rolled-up blanket either under the shoulder that should remain on the floor or under the crossed-over leg or knee.
Marjaryasana I-II - Cat I -II
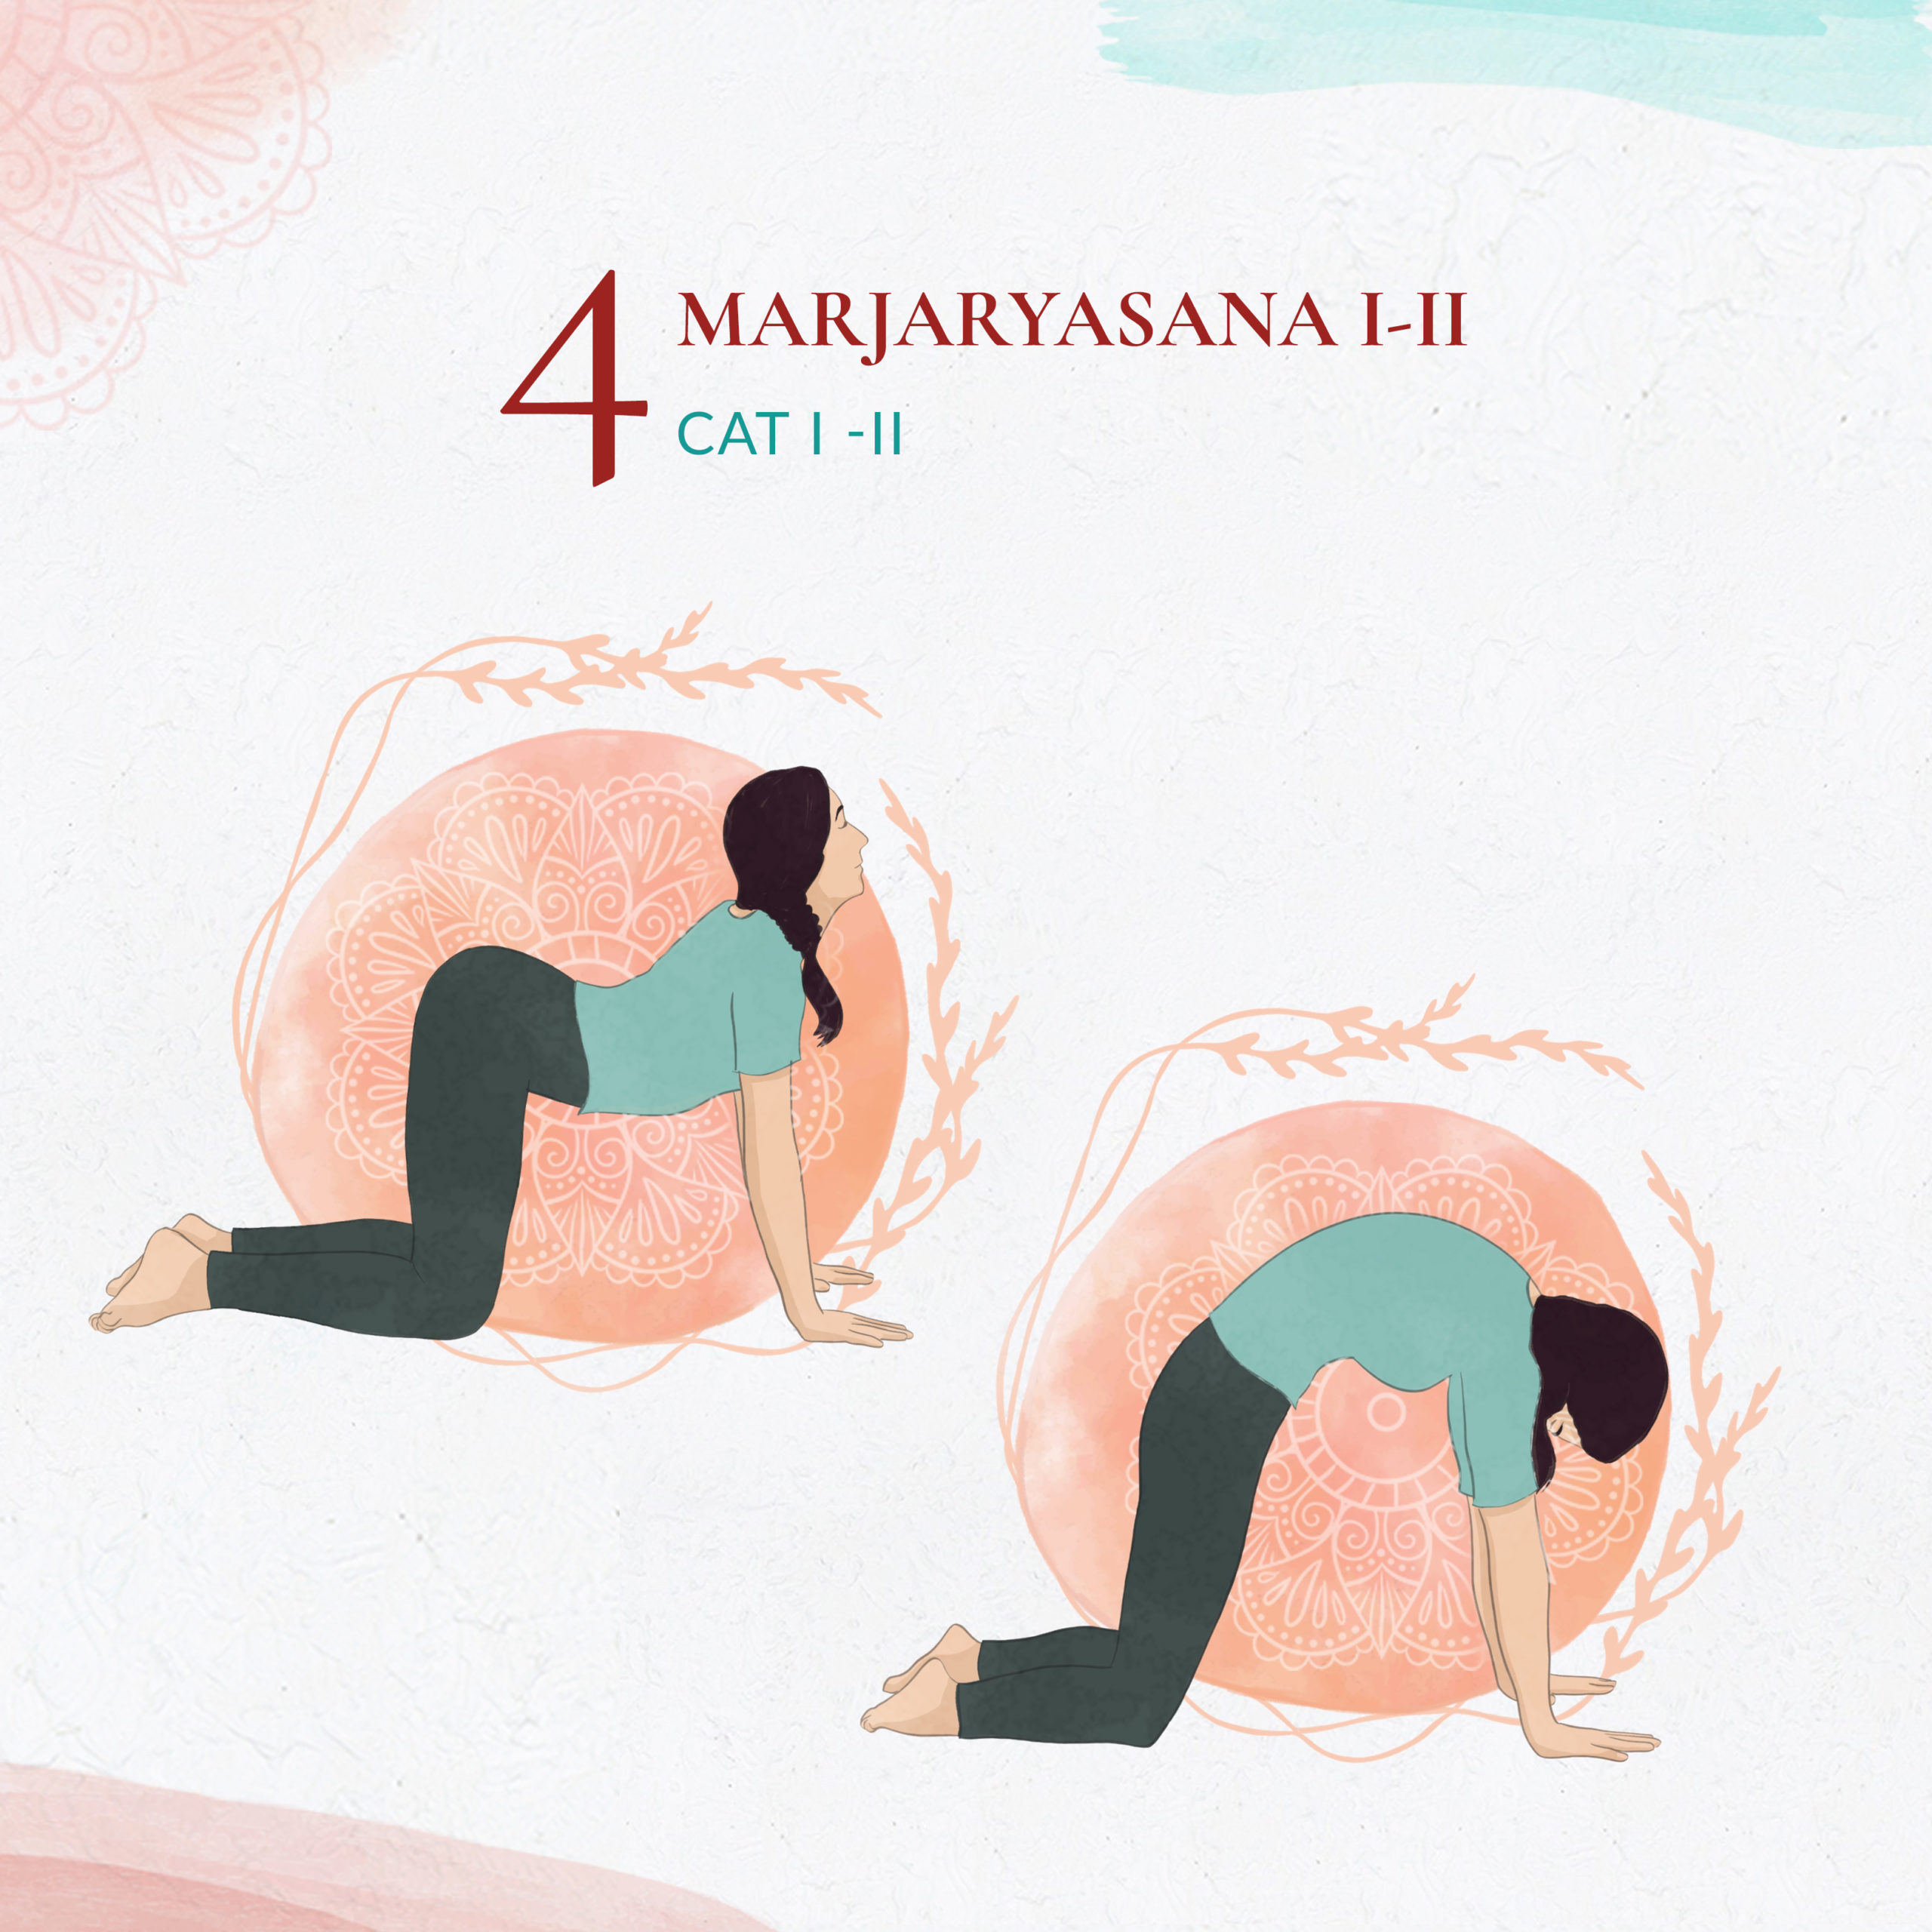
This practice of Cat Pose and Cow Pose together helps open up the chest and increases lung capacity.
- Come onto all fours, with your knees right below your hips and your wrists below your shoulders.
- As you inhale, arch your back, open the chest, push your belly button toward the floor, and lookup (Marjaryasana I).
- As you exhale, push your hands and knees into the floor and round your back as much as possible, bringing your chin to your chest and the middle back toward the ceiling (Marjaryasana II).
Sukha Hanumanasana - Low lunge
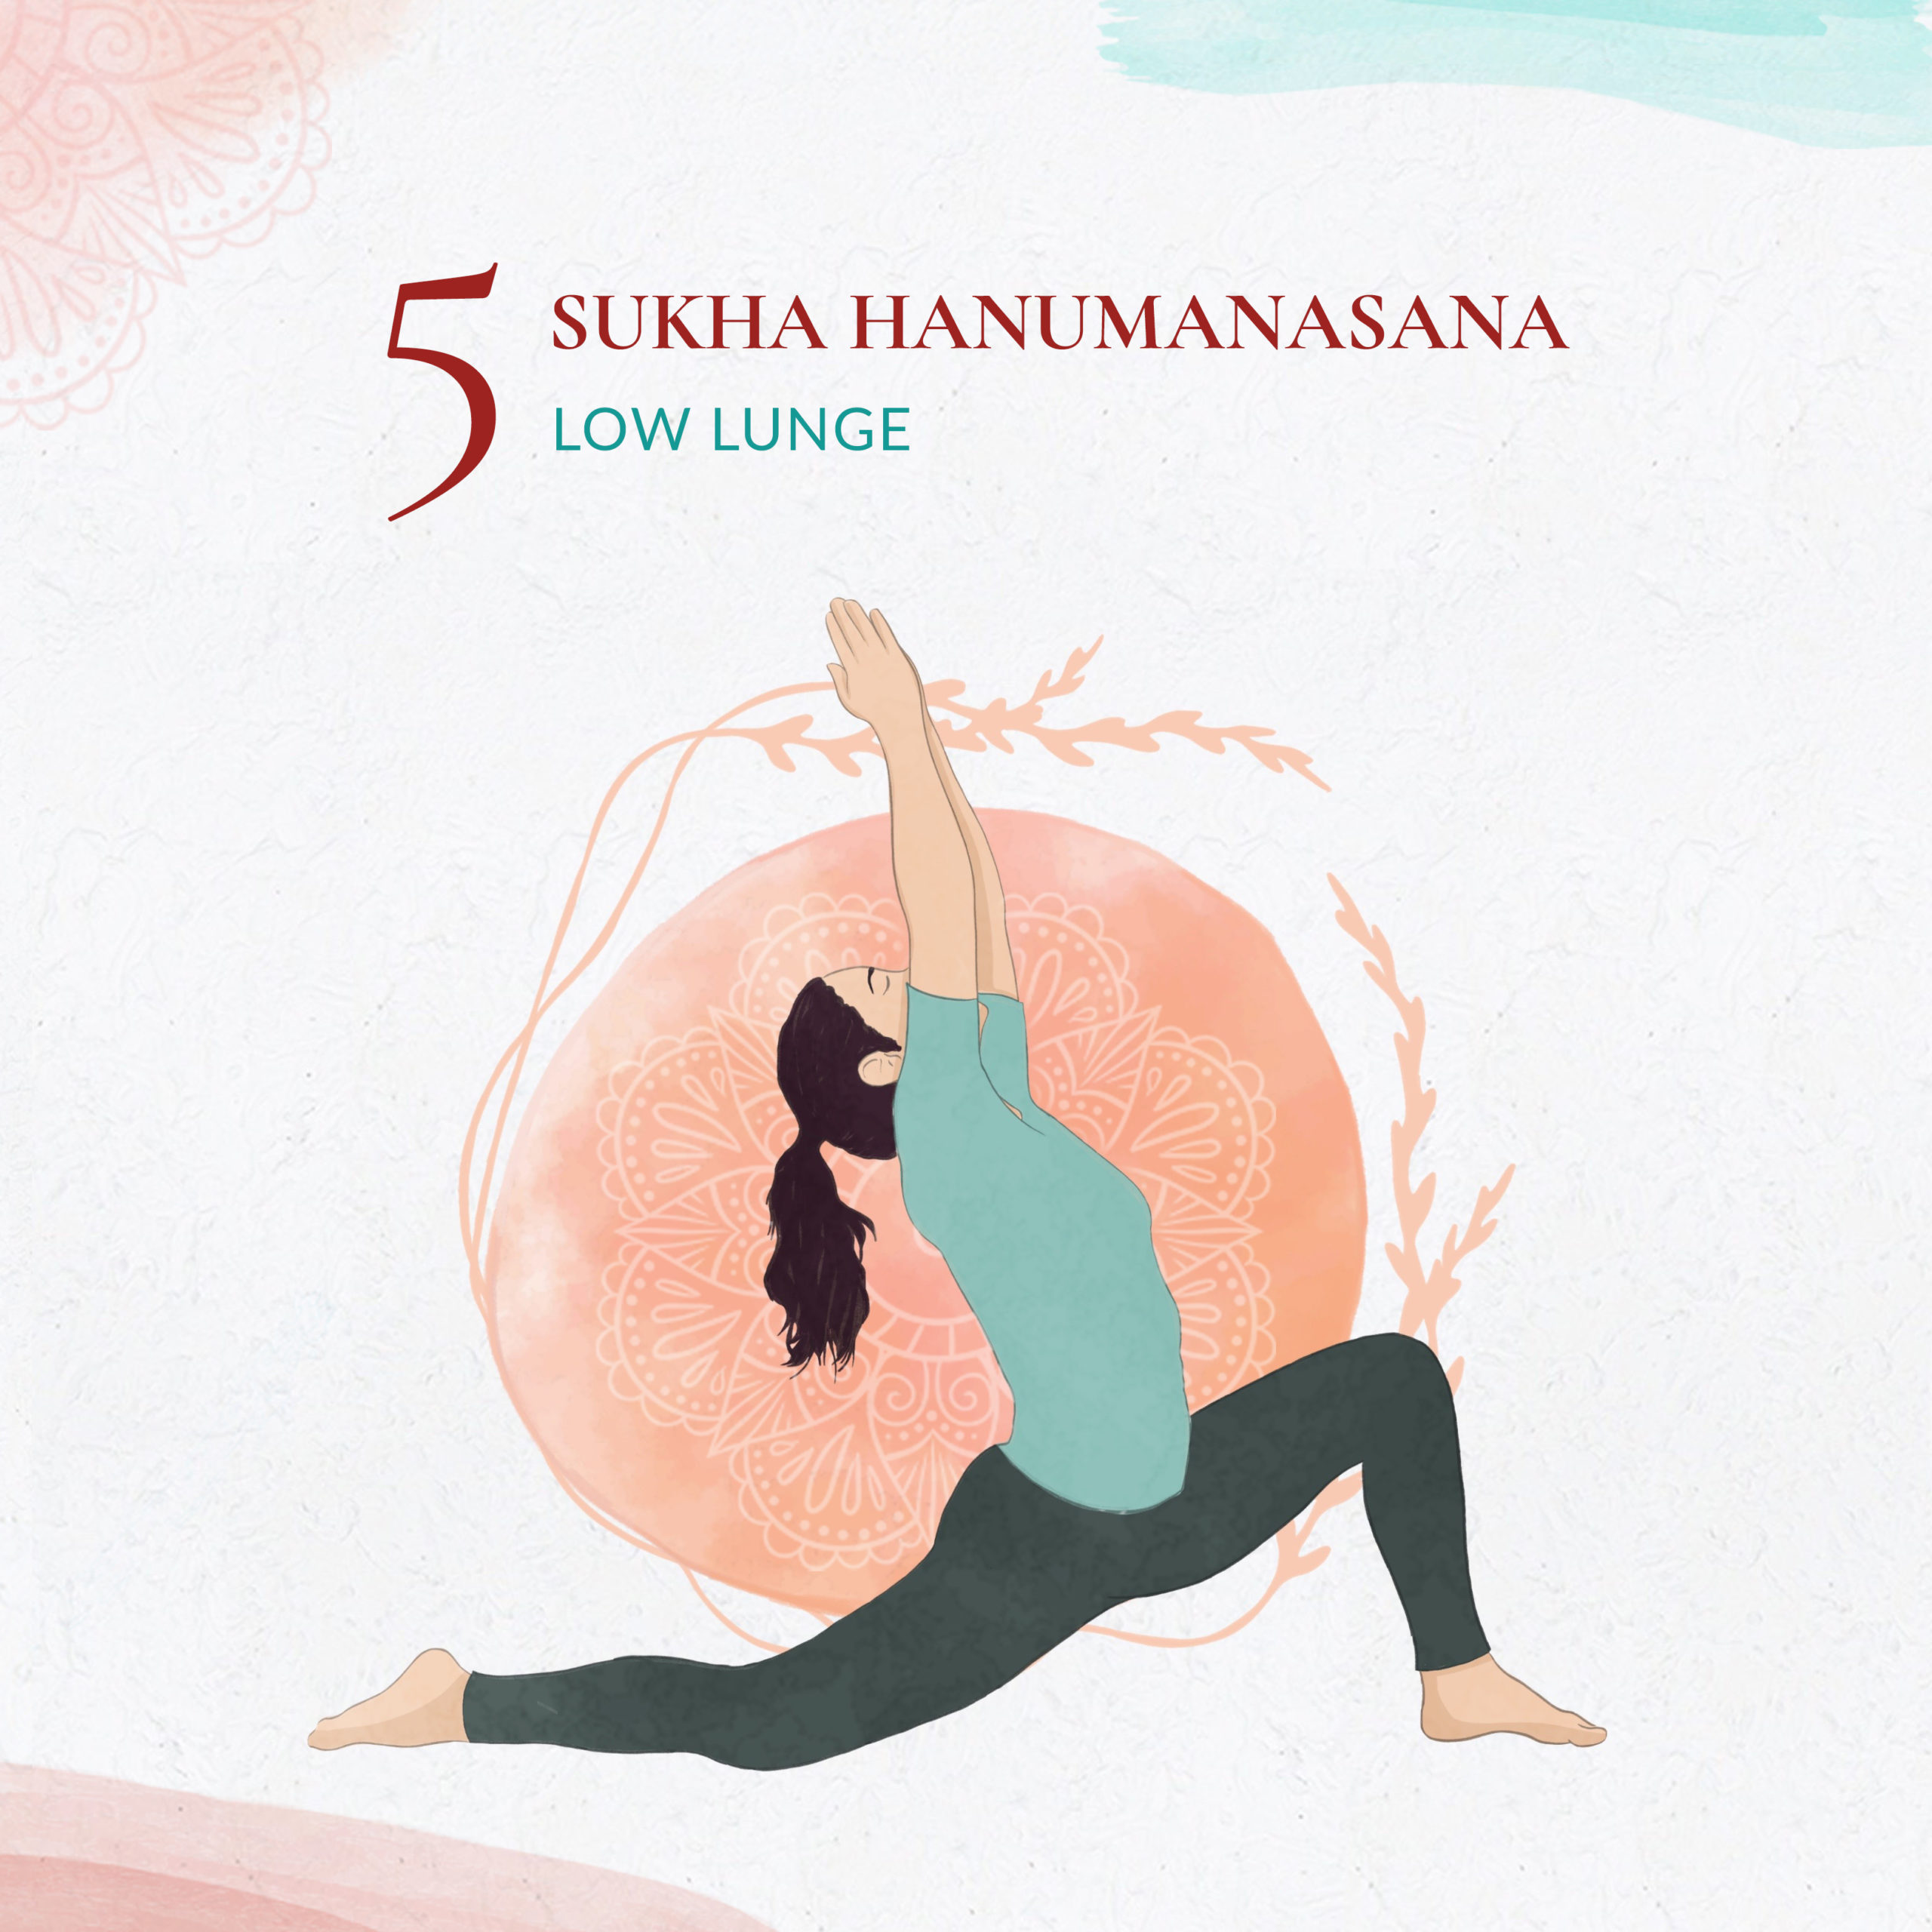
This pose helps to open the chest and encourages deep breathing.
- Start in a low lunge, with your hands along the front foot on the floor.
- The knee of your back leg is on the floor, foot pointed.
- Now push the back leg as far away as possible, while still maintaining the front-knee-above-ankle alignment.
- Lift your chest, push your pelvis forward toward your front leg, and reach with your hands above your head, palms together.
- Reach upward and backwards with your hands, allowing your spine and especially chest to arch even more, and look up toward the eye-shaped space between your palms.
Important Alignment Cues
The kneecap of the bent leg is slightly behind or right above the centre of the ankle. Maintain an angle of at least 90 degrees. Draw your shoulder blades down toward the waist and keep the back of your neck elongated.
Contraindications & Cautions
Be cautious with this pose in case of knee or groin issues. You can rest your back thigh against a cushion or bolster to decrease strain on the knee or groin.
Conclusion
Asthma can be a life-altering disease that affects one’s quality of life. Although there is no cure for asthma, yoga and pranayama can be a therapy included in managing the symptoms of asthma. It is crucial that asthma patients refrain from suddenly increasing their breathing rate or pattern.
Rather, all exercises must be carried out with extreme caution, ideally with a qualified and experienced yoga teacher and it is best to consult one’s medical doctor before attempting yoga asana and yoga breathing exercises especially when breathing patterns are changed, for example in breath retention. Yoga and breathwork are meant to be supportive interventions and should only be done with the approval of the treating physician.
Resources

Get a free copy of our Amazon bestselling book directly into your inbox!
Learn how to practice, modify and sequence 250+ yoga postures according to ancient Hatha Yoga principles.

