Sun Salutations – Surya Namaskar
Surya Namaskara is a good warm-up that prepares the body for any following asanas or yoga poses
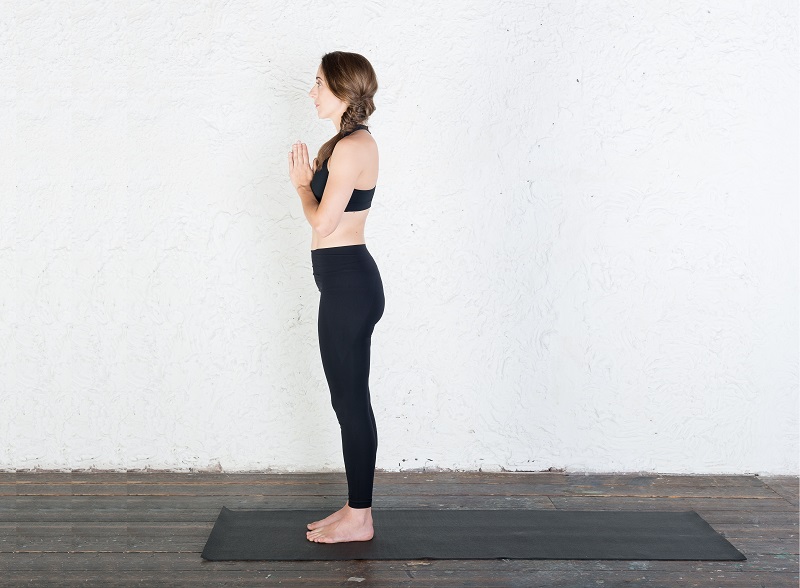
Traditionally the Sun Salutation was practiced in the early mornings at sunrise with the purpose to activate the energy in the body as a preparation for all kinds of powerful asanas. It is highly recommended to start every practice of yoga asanas with Surya Namaskara since it is an excellent general warm-up exercise consisting of 12 poses for the spine. Sun Salutation is a sequence of exercises for the spine which gives flexibility to the spine and the other limbs of the body. Since it improves the overall flexibility of the body, Sun Salutation is very healing for anyone, but especially for the elderly and for people who are very stiff. Sun Salutation is not an asana, but a sequence of calm and fluent movements, coordinated with the breath. The purpose of the Sun Salutation is to warm up the spine and to improve the body's energy.
Surya Namaskara is a good warm-up that prepares the body for any following asanas or yoga poses. During Sun Salutation, you use hundreds of muscles, regulate breathing and center your thoughts. Sun Salutation is very healing and should be done 6 to 12 times.
Category | Preliminary Practice |
Chakra | Anahata/Heart Chakra |
Meaning | In Sanskrit, surya means sun and namaskar means greeting or salutation. |
Benefits of Sun Salutation
- Although Surya Namaskar can be practiced at any time of the day, it is best to practice at sunrise as sun rays can help revitalize the body & the mind. Surya Namaskar can be done in a 3-speed variation– slow, medium or fast pace. A slowed pace helps increase body flexibility, and a medium pace helps in muscle toning. Fast-paced rounds of Surya Namaskar are beneficial to one’s cardiovascular health and can aid in weight loss.
- Surya Namaskar helps improve blood circulation and strengthen heart function. It also enhances the resting cardiovascular parameters such as cystolic blood pressure, diastolic blood pressure and pulse pressure.
- Surya Namaskar stimulates a rhythmic breathing process as breath is synchronized with each movement. This empties the lungs more vigorously and there is an opportunity for more oxygenated air to refill them.
- More alveoli of the lungs are expanded, stimulated and then cleansed. Alveoli are a crucial part of the respiratory system associated with breathing. Alveoli are tiny, balloon-shaped air sacs. Their function is to move oxygen and carbon dioxide (CO2) molecules into and out of the bloodstream.
- Through the rhythmic breathing of Surya Namaskara, the oxygen content of the blood is increased. This improves oxygenation of the body, especially the heart, and brain. The cardiac muscles also improve through this rhythmic breathing and movement.
- Surya Namaskar is also beneficial for digestive health and other systems of the body as the practice of Surya Namaskar interacts with the organs of the body directly, by applying pressure, massaging, stretching and overall toning up the muscles. This aids the elimination processes of the body.
- The practice has mental health benefits. Consistent practice of Surya Namaskar sharpens one’s ability to focus, improves self-confidence, and helps to develop self-discipline. It calms the nervous system and its consistent practice can contribute to managing anxiety, depression, and insomnia.
Instructions for Surya Namaskar
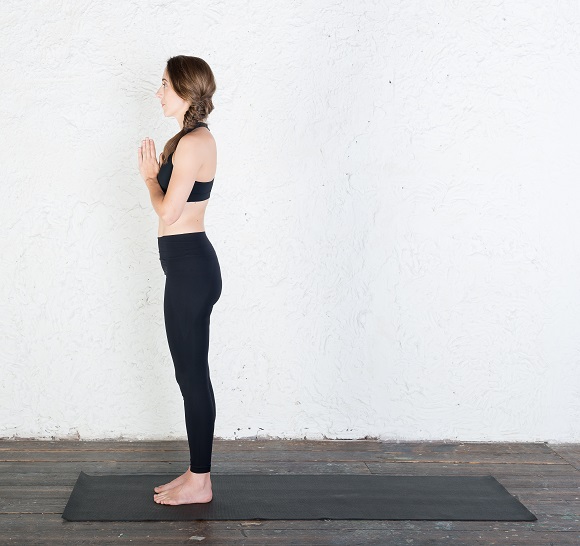
Starting position: Stand straight, with spine erect and shoulders relaxed. Your feet are hip-width apart. Your knees are straight but not hyper-extended; your arms are relaxed next to your body.
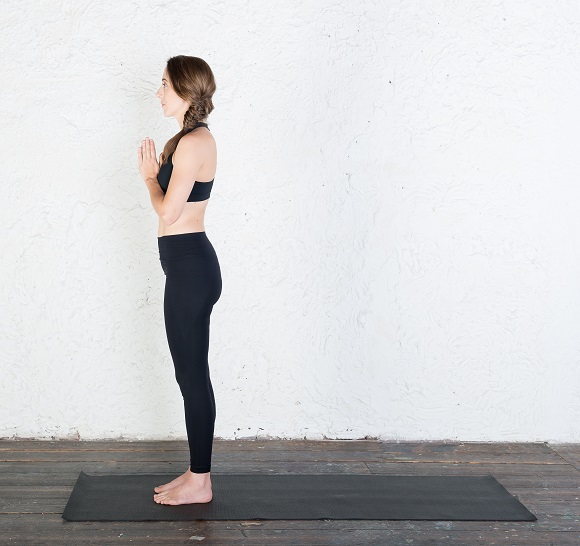
1. Breathe in and out, bring your palms together in front of the chest
- Shoulders and elbows are relaxed
- Knees are straight but relaxed.
- Back of your neck is long.
- Reach up with the crown of your head toward the ceiling
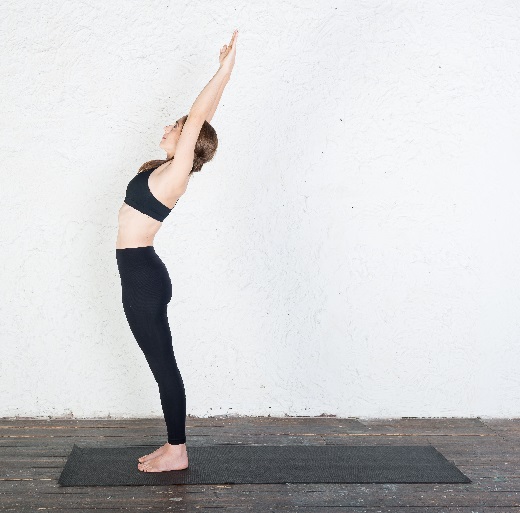
2. Breathe in and reach with your arms—up and backward.
– Your arms are alongside your ears
– Look diagonally upward, do not drop your head back
– Knees are straight, hips pushing slightly forward
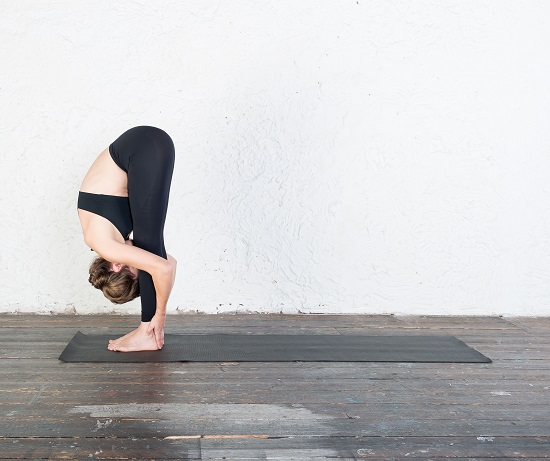
3. Breathe out and bend forward, placing your palms on the floor, outside of your feet.
– If you cannot place your palms on the floor with your knees straight, you can bend your knees slightly
– Reach with your nose toward your knees
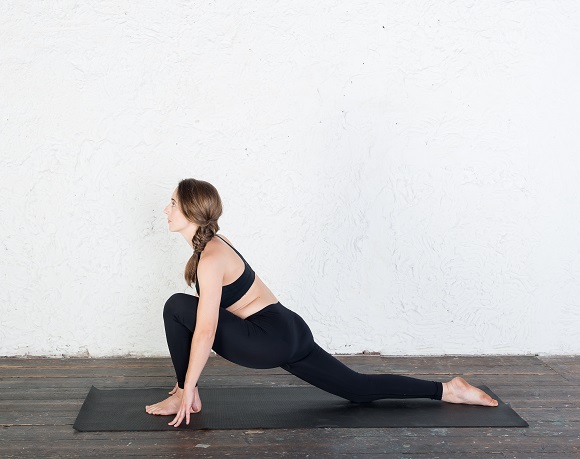
4. Keeping your hands there, inhale and bring your right leg back as far as possible.
– Place your right knee on the floor and point your right foot
– Push the pelvis forward, without losing the 90-degree angle of your left knee
– Open your chest, look diagonally upward while
palms remain on the floor
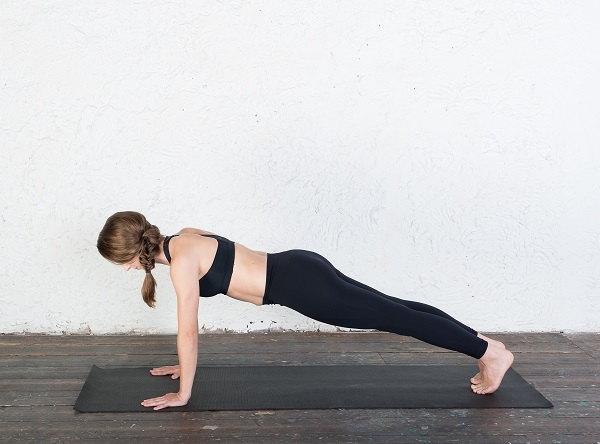
5. Hold the breath and bring your left leg back
– Your body is in a straight line from your head to your heels (push-up position).
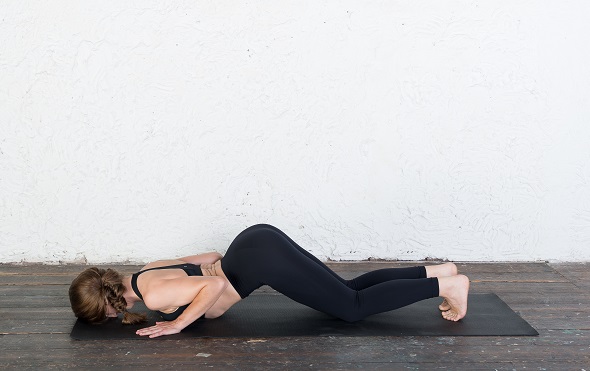
6. Breathe out and drop your knees, chest, and forehead to the floor.
– Without moving your body backward, bring your chest down to the floor between your hands. Then bring your forehead to the floor.
– Knees, chest and forehead are touching the floor. Hips are off the floor
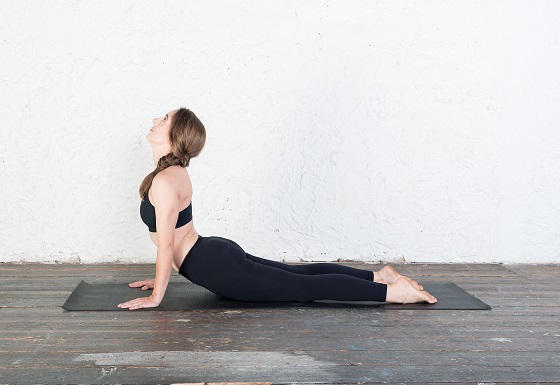
7. Breathe in and scoop up, looking up
– Open your chest and look up and back without dropping the head.
– Legs remain on the floor, feet are pointed.
– Do not move your hands as you come into this position.
– Elbows are slightly bent, tucked in toward your body, and your shoulders are pushing down.
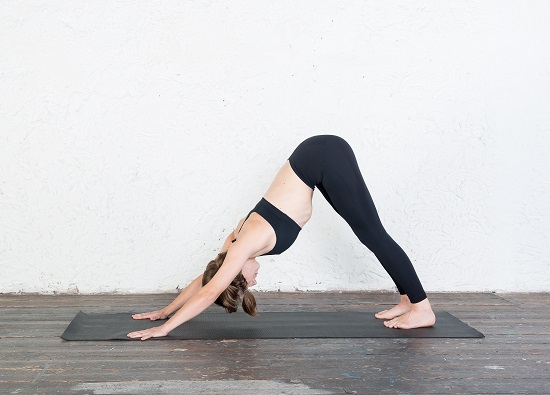
8. Breathe out, curl your toes and push the hips up
– Without moving your hands or feet, push your hips toward the ceiling.
– Your hands are flat on the floor, heels can be slightly lifted off the floor. Head is between your arms. Look at your feet, trying to bring your chest to your knees.
– This pose is also known as the ‘Inverted V Pose’
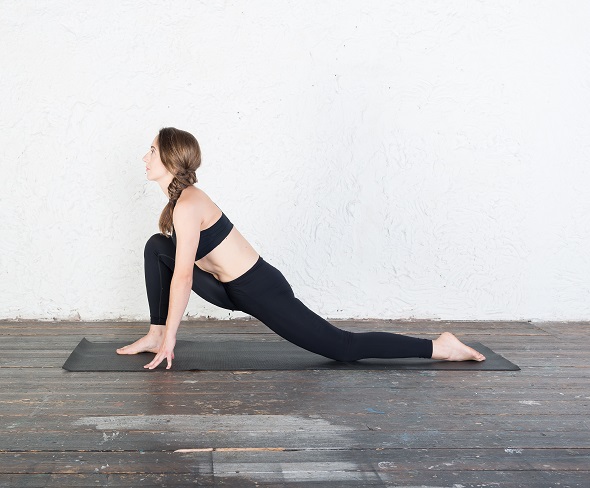
9. Breathe in and bring the right foot forward in between your hands
– Keep your fingers and toes in one line.
– Drop your left knee to the floor, point your left foot, and push your pelvis forward and toward your right heel.
– Look diagonally upward—the same as in Position 4.
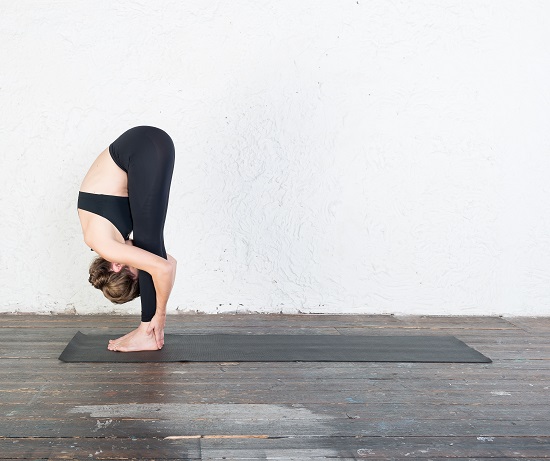
10. Breathe out, and keeping your hands where they are, curl the toes of your left foot and step your left foot forward, next to your right foot.
– Nose in between your knees, hands holding your ankles.
– Keep the knees straight
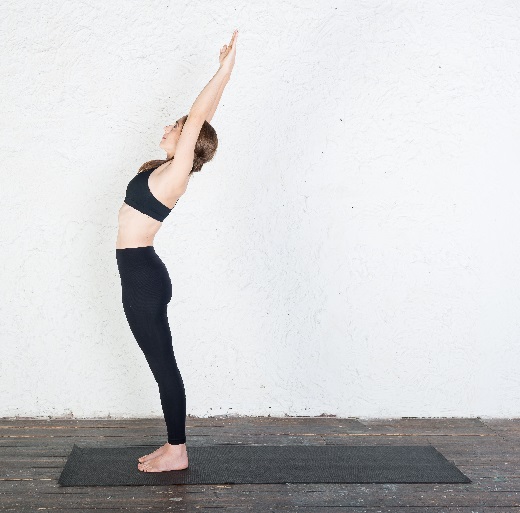
11. Breath in and reach with your hands out and upward.
Arch backward—the same as in Position 2.
12. Breathe out, relax your hands
This completes half of a round. Repeat to the left (left leg stepping first back and forward) to complete one full round of Sun Salutation.
Duration
- Perform 6 – 8 rounds
Cautions and Contra-indications
It is best to practice Surya Namaskar under the guidance of a certified and experience yoga teacher. Seek modifications if:- You experience back pain
- You are pregnant
- You have high blood pressure
- You have heart problems
- You suffer from arthritis
- You have injuries especially wrist injuries
Relevant Poses
Rest in Corpse Pose. Sun Salutations warm you up for yoga asanas such as Headstand – Sirshasana.
For more yoga asanas and exercises, make sure to visit the Arhanta Yoga Asana Guide!
Get a free copy of our Amazon bestselling book directly into your inbox!
Learn how to practice, modify and sequence 250+ yoga postures according to ancient Hatha Yoga principles.
