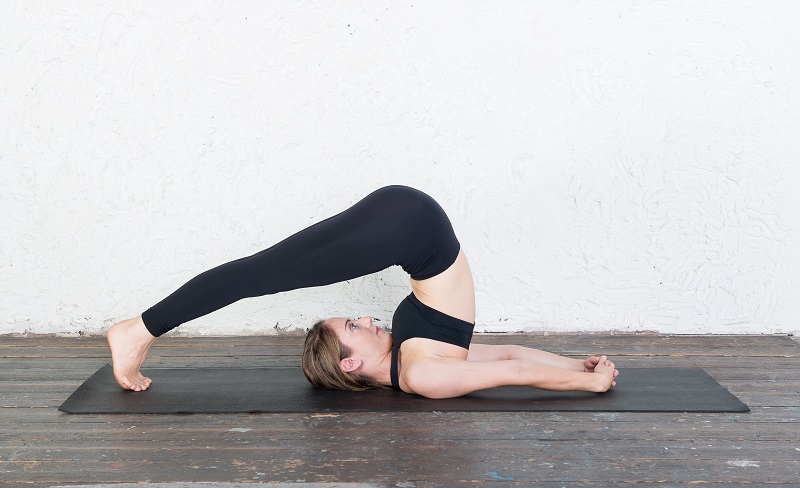
Plough Pose – Halasana
Plough Pose gives an intensive stretch to the entire spine, but mainly affects the neck and throat region.
Category | Inversion |
Chakra | Vishuddha/Throat Chakra |
Benefits of Plough Pose
Regular practice steadily comfortably steadily and comfortably within a balanced yoga asana program:
- Stimulates the Throat Chakra and therefore stimulates the thyroid and parathyroid glands, improving their overall functioning;
- Slows down the heart rate and lowers blood pressure, therefore giving the heart a rest;
- Activates the parasympathetic nervous system, ensuring the proper function of all internal processes such as digestion, elimination, and so on;
- Improves exchange of oxygen and carbon dioxide in the lungs by making active use of the lower part of the lungs;
- Improves digestion and cures constipation as it releases gravitational compression on the colon;
- Strengthens deep core muscles;
- Increases upper-body and arm strength;
- Releases tension in the entire spine, especially the lower back and cervical region;
- Stretches the hamstrings and glutes;
- Creates flexibility in the shoulder joints; and
- Massages all visceral organs by compression, and upon release of the pose floods organs with fresh, nutrient-rich blood.
Instructions for Halasana
- Lie down on your back, with your feet together and arms next to your body.
- Keeping your head and neck on the floor, breathe in as you lift both legs to 90 degrees.
- As you lift your hips toward the ceiling, place your hands on your hips and walk your hands up toward your
shoulder blades. - As your legs start to lift u, guide them toward your head. Slowly place your feet on the floor behind your head.
- Keep your knees straight, feet together, and feet flexed.
- If your toes can reach the floor comfortably, you can interlock your hands on the floor behind your back.
- Keeping your knees straight, gently push your heels away, and breathe
evenly.
Alignment Cues for Plough Pose
- Knees should be kept straight if possible.
- Look straight upward toward the ceiling; do not turn your head.
- Hips ideally are right above your shoulders.
- Shoulder blades are drawn toward each other to release pressure on your neck.
Duration of Hold
- Beginners: 15–60 seconds
- Intermediate: 30–90 seconds
- Advanced: 90 seconds–3 minutes
- A thumb rule for the duration of Plough Pose is half the duration of Shoulderstand. So if you hold the Shoulderstand Pose for 2 minutes, stay in Plough Pose for 1 minute.
Modifications
- Place a folded blanket 3–5 cm thick underneath your shoulders to release pressure on your neck (as in Shoulderstand).
- If you cannot reach the floor with your feet, try opening your feet wider apart and gently placing them down one foot at a
time. - Otherwise, support your feet on a block or against the wall. In this case, keep the support of your hands on your
lower back.
Cautions and Contra-indications
- Please consider these precautions when practising Plough Pose. Avoid the pose or seek a qualified, experienced yoga teacher to help you if you have:
- Hypertension
- Cardiovascular issues
- Neck issues
- Shoulder issues
- Recent surgery or inflammation in your head region (e.g. ears, eyes, nose, etc.)
- Arthritis and osteoporosis
- Brain injuries
- Lower-back and spinal issues (e.g. chronic pain, herniated disc, sciatica, SI-joint instability)
- Acute migraine or headache
- Asthma or other breathing disorders: hold only for short durations and skip altogether if it causes too much discomfort,
nausea, or shortness of breath
Relevant Poses
Rest in Corpse Pose and then move on to Half Bridge Pose - Ardha Setu Bandhasana.
For more yoga asanas and exercises, make sure to visit the Arhanta Yoga Asana Guide!
")
Get a free copy of our Amazon bestselling book directly into your inbox!
Learn how to practice, modify and sequence 250+ yoga postures according to ancient Hatha Yoga principles.