You roll out your mat, follow your instructor, stretch a little deeper, and hold your breath without noticing. And then the question comes: Am I actually doing this correctly? Understanding yoga asana dos and don’ts for beginners helps you know what to do, what to avoid, when to modify, and how to practice safely.
Yoga Asana Dos and Don’ts: What Beginners Need to Know
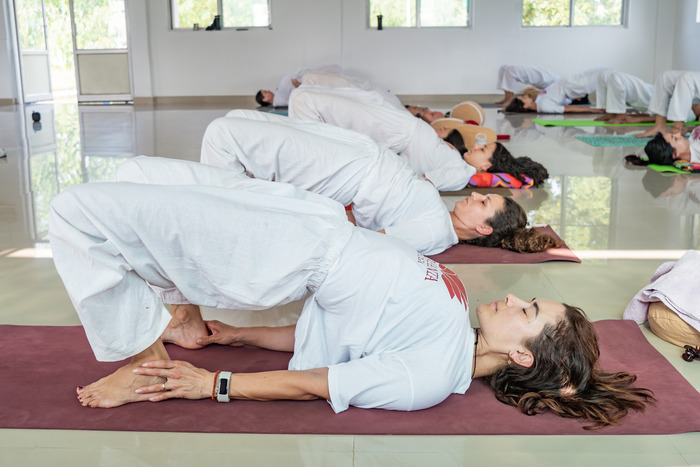
Imagine you are in your first yoga class. The teacher demonstrates a forward fold perfectly, and you try to copy the same depth. Your hands do not reach the floor, so you push harder. Your hamstrings start pulling, but you assume discomfort means the pose is working.
This is when you see why knowing the dos and don’ts of yoga asana matters for beginners. Good practice isn’t about copying the final pose. It’s about learning how to enter, hold, adjust, and exit each asana with control.
What Do the Dos and Don’ts Actually Mean?
The dos and don’ts of yoga aren’t a strict checklist that every beginner must follow the same way. They are practical guidelines that help you make better decisions while practicing.
They include:
- Preparing your body before demanding movements
- Entering and leaving poses with control
- Working within an appropriate range of motion
- Coordinating movement with your breath
- Using appropriate effort rather than forcing a position
- Recognizing when you need to modify a pose
- Progressing gradually instead of rushing into advanced practices
Why Shouldn’t Beginners Copy the Teacher Exactly?
Consider a standing forward fold. Your teacher may place their palms comfortably on the floor while you can barely reach your shins. Trying to match their position by pushing harder does not automatically make your practice more effective.
Your range of motion can differ because of your body type, flexibility, strength, past activities, or current experience with yoga.
So instead of copying your teacher, you could:
- Bend your knees
- Reduce the depth of the fold.
- Place your hands on blocks.
- Focus on maintaining controlled breathing.
- Gradually develop your range over time.
Where Do These Principles Come From?
The modern yoga asana dos and don’ts for beginners draw from two different but complementary sources: traditional yoga principles and modern knowledge of anatomy, movement, and safety.
Traditional yoga does not reduce asana to achieving a particular physical shape. In Patañjali’s Yoga Sutras, asana is associated with Sthira (steadiness) and Sukha (ease or comfort).
This does not mean that Patanjali provided a modern list of beginner safety rules. Rather, these ideas offer a useful traditional perspective: an asana involves both stability and an appropriate sense of ease.
What Does Traditional Yoga Teach Us About Asana?
Traditionally, practicing an asana is about more than just stretching a muscle or reaching a certain shape.
Useful principles include:
- Steadiness: maintaining stability in the posture
- Ease: avoiding unnecessary struggle or tension
- Awareness: staying attentive to the body and breath
- Appropriate effort: working without turning your practice into force
- Consistency: developing your practice gradually
What Does Modern Anatomy Add?
Modern yoga teaching also considers how individual bodies move.
Teachers may use knowledge of:
- Joint mobility
- Muscle strength and endurance
- Range of motion
- Balance and stability
- Body proportions
- Movement mechanics
- Previous injuries or physical limitations
This explains why two people can practice the same asana correctly while looking quite different. Modern anatomy also helps you acknowledge that everyone has a different body type.
For example, a beginner with tight hamstrings might need to bend their knees in a forward fold. This doesn’t mean their pose is less effective. It could be the best option for their current flexibility.
So, What Should Beginners Remember?
Think of the yoga asana dos and don’ts for beginners as principles for making sensible choices, not rules for forcing the body into a particular shape.
As you learn the dos and don’ts of yoga asanas for beginners, ask yourself:
Can I maintain steady breathing?
Can I move with control?
Am I forcing my range of motion?
Would a prop or modification help?
Does this variation suit my current ability?
Asking these questions is often more important than asking whether your pose looks exactly like the teacher’s.
Related: Yoga Cues: Teacher Dos & Don’ts for a Safe & Functional Class
How the Right Yoga Asana Habits Support Better Practice
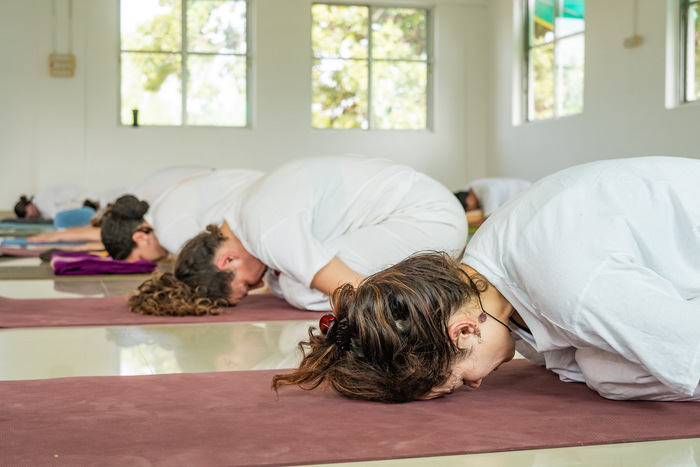
Better Body Awareness
Yoga asks you to pay attention to more than a pose’s final shape. You need to notice where your joints are, which muscles are working, how your weight is distributed, and whether your breath remains steady.
This skill is called proprioception, which means sensing your body’s position and movement. A 2025 review found that yoga might help improve body awareness, but the researchers pointed out that studies on this topic use different methods and vary in quality.
If you are new to yoga, this awareness can help you notice when you are gripping too tightly, losing your balance, or stretching past what feels comfortable.
More Controlled Movement
When you move slowly, you have more time to notice what your body is doing instead of hurrying to finish the pose.
For example, as you move into Warrior II, pay attention to where your feet are, how your knees are aligned, how your weight is spread, whether your shoulders are tense, and how you are breathing. This helps you gain more control in your practice.
Mobility Without Forced Flexibility
A deeper pose is not automatically more effective.
If your hands do not reach the floor in a forward fold, try bending your knees or using blocks. These options help you move safely without forcing your flexibility.
Strength and Stability
Many yoga poses need more than just flexibility. Depending on the pose, you might also need:
- Muscular endurance
- Joint stability
- Balance
- Postural control
- Weight-bearing strength
That is why a smaller, well-controlled movement can sometimes be more helpful than trying to force your body into a perfect-looking pose.
Your Anatomy Directly Impacts Your Practice
Two people can perform the same asana differently and still practice appropriately. Bone structure, body archetypes, limb proportions, joint anatomy, mobility, strength, and previous injuries can all influence movement.
For example, one person might easily put a hand on the floor in Triangle Pose, while someone else might need a block or another prop. Using props does not make your practice less effective. It just means you are working with your own body’s needs.
Also See: 10 Essential Hatha Yoga Poses (With Alignment Cues)
Yoga Asana Dos and Don’ts: A Step-by-Step Guide for Beginners
Step 1: Check Your Starting Point
Before you step onto the mat, consider what your body is dealing with today.
Are you recovering from an injury or illness? Are you feeling more tired than usual? Are you pregnant, postpartum, or do you have a health condition that might need special adjustments?
You don’t have to figure everything out on your own. If you have a medical condition, pain, or injury, check with a healthcare professional or a qualified yoga teacher about what changes you might need before you practice.
Step 2: Prepare Your Practice Space
You do not need an elaborate setup to practice yoga. You do need enough space to move without hitting furniture or another person.
Check that:
- Your mat is on a stable, non-slip surface.
- You have enough room to extend your arms and legs.
- Your clothing allows comfortable movement.
- Blocks, straps, blankets, or other props are within reach if needed.
- The floor is free from anything you could slip or trip over.
Step 3: Start Gradually
Don’t make your first movement of the day your deepest forward fold.
We always advise students to begin with gentle movements. These gentle movements can warm up your joints and muscles. Try simple joint circles, gentle spine movements, or a few easy poses you already know before making things more challenging.
Starting slowly also helps you notice how your body feels today.
The answer might be different from how you felt yesterday.
Step 4: Establish the Base Before Chasing the Shape
Instead of focusing on how the final pose looks, make sure you have the basics in place first.
Depending on the asana, check:
- Where your hands or feet are placed
- How your weight is distributed
- Whether your joints feel stable
- Whether your spine is appropriately positioned
- Whether you can maintain the position without unnecessary tension
For example, in Warrior II, it’s more important to set up your feet and balance your weight than to force your front thigh to be parallel to the floor right away.
Step 5: Let Your Breath Give You Feedback
Your breath can give you clues about how you’re doing in a pose.
If you find yourself holding your breath, gasping, or having trouble breathing steadily, ease up or come out of the pose.
This doesn’t mean you need to use the same breathing for every pose. As a beginner, don’t hold your breath on purpose to stay in a tough position longer.
Step 6: Enter the Pose Slowly
Moving with control is always better than moving quickly.
When you move slowly, you have time to notice if your balance, alignment, or breathing changes as you get into the pose. It also helps you stop before you go past what you can control.
Step 7: Find Your Appropriate Range
A strong sensation doesn’t always mean something is wrong, and feeling uncomfortable doesn’t always mean you should keep going.
Try to notice the difference between muscle effort, normal stretching, general discomfort, and sharp pain.
If you experience concerning pain, stop and reassess your alignment rather than trying to prove that you can tolerate it.
Step 8: Hold Without Trying to Go Deeper
Once you are in the pose, you don’t need to spend the entire hold searching for another centimeter of range.
Instead, check:
Can I breathe steadily?
Can I stay aware of my body?
Can I maintain the position without excessive effort?
If the answer changes, reduce the intensity, shorten the hold, or use a prop.
Step 9: Exit the Asana with the Same Attention
Getting into a pose carefully but rushing out of it may reduce its effectiveness.
Be extra careful when coming out of deep twists, forward bends, backbends, inversions, or poses where you’re supporting your weight. Move with awareness, and return to a neutral or comfortable position before starting the next pose.
Step 10: Pause and Observe
Before you move on, pause and notice how the pose affected you.
Ask yourself:
- How does my body feel now?
- Is my breathing steady?
- Did one side feel different from the other?
- Did I experience any pain?
- Would I change the range, prop, or variation next time?
Taking this short pause can teach you things you might miss if you move from one pose to the next.
A Lesson We Saw in a YTT Batch
Last year, in one of our YTT groups, we met a student who always tried to go deeper into certain poses because she thought a stronger stretch meant faster progress. She looked determined, but she often lost her breath and struggled to stay in control.
Instead of asking her to “stretch less,” we simply changed the task. We reduced the range, introduced a prop, and asked her to breathe steadily while holding the position.
The change was simple, but it shifted her focus from “How deep can I go?” to “Can I practice this with control?”
That is an important lesson for beginners. The right modification does not take you away from the practice. Sometimes, it lets you practice the pose more effectively.
The Beginner’s Checklist
Before and during an asana, remember:
Prepare → Establish your base → Breathe → Move with control → Find your range → Modify when needed → Exit carefully → Observe.
Remember, the aim is to develop enough awareness to make appropriate choices as your practice changes from one day to the next.
Also See: Standing Yoga Poses for Beginners to Build Strength, Balance & Confidence
Common Yoga Asana Mistakes Beginners Make and How to Correct Them
1. Chasing the Final Shape
Why it happens:
You see the teacher’s hands reach the floor or their chest move closer to their legs, so you assume your pose should look the same. You try to copy the pose without focusing on alignment.
What to do instead:
Focus on the anatomy of the pose, not its appearance. If you can’t reach the floor, use props like a block or reduce the depth while maintaining control.
2. Going Too Deep Too Soon
Why it happens:
You see the teacher’s hands reach the floor or their chest move closer to their legs, so you assume your pose should look the same. You try to copy the pose without focusing on alignment.
What to do instead:
Stay within a range you can control. Bend your knees, shorten the movement, or use a prop when needed. Remember that deeper is not always more effective.
3. Holding Your Breath
Why it happens:
When a pose feels difficult, beginners often focus so much on staying in position that they stop breathing naturally. This makes the pose uncomfortable and causes unnecessary trouble.
What to do instead:
Keep your breathing steady instead of holding your breath to force yourself through a demanding position. If you can’t breathe comfortably, reduce the intensity or come out of the pose.
4. Locking or Overextending the Joints
Why it happens:
Beginners may confuse a straight joint with a locked joint, particularly in standing poses. While teaching a standing pose, I have seen many students desperately trying to lock their joints. When I ask why they lock their joints so hard, they often reply that they do it because they want their joints to be straight.
What to do instead:
Don’t aim for stability by aggressively pushing a joint to its end range. In a standing pose, for example, keep the knee supported and controlled rather than forcing it backward to make the leg look straighter.
5. Pushing Through Pain
Why it happens:
Yoga is sometimes presented as something that requires you to “push through” discomfort. Beginners may therefore ignore pain signals from their body. They keep going to stay in the pose even when they experience soreness, shortness of breath, and other discomforts.
What to do instead:
Learn to differentiate effort from pain. A working muscle or stretching sensation can feel challenging, but sharp, sudden, escalating, or unfamiliar pain is a clear sign for you to stop and reassess your posture. In that case, stop and recheck your alignment.
6. Treating Alignment as One Perfect Shape
Why it happens:
Beginners often hear alignment cues as fixed rules: the knee must be here, the spine must look exactly like this, or everyone’s pose should have the same geometry. But they often forget that everyone’s body is different, and so is the anatomy.
What to do instead:
Think about functional alignment; a position that supports the intended movement while considering the person’s anatomy, body archetype, ability, and the demands of the pose.
Two students can therefore have slightly different positions even when both are practicing the pose correctly.
7. Skipping Preparation and Recovery
Why it happens:
I have seen many students skip the warm-up poses and jump straight into more demanding poses. However, your muscles need to warm up before you introduce them to any challenging posture.
What to do instead:
Give your body time to prepare for greater physical demands. Begin with simpler movements and gradually increase intensity. After demanding work, allow your body some time to settle before moving into another challenging position.
8. Attempting Advanced Practices Too Early
Why it happens:
Many beginners feel eager to try advanced yoga poses before developing the necessary strength, flexibility, and body awareness. They may attempt challenging postures by comparing their practice with experienced practitioners or expecting quick progress. However, the body needs time to develop the strength, stability, and mobility required for advanced asanas.
What to do instead:
Build the strength, mobility, balance, technique, and body awareness that the practice requires first. The National Center for Complementary and Integrative Health (NCCIH) specifically advises beginners to approach challenging practices such as headstands, shoulder stands, lotus, and forceful breathing with caution. So, practice these poses only under a qualified teacher’s guidance.
Also See: 7 Beginner Yoga Mistakes I See as a Teacher (And How to Fix Them)
How to Modify Yoga Asanas: Props and Variations for Every Level
A beginner may assume that using a block, bending the knees a little, or holding a pose for less time means they are not doing the pose right. That idea can lead to unnecessary strain.
Remember, making changes to a pose is not a sign of failure. It simply helps you adapt your practice to your current abilities.
Beginner Level: Build Control First
If you are new to yoga, focus on noticing how each pose feels and learning to control your body, instead of trying to make things harder right away.
Useful options can include:
- Shorter holding times
- A smaller range of motion
- A wider stance when appropriate
- Wall support for balance
- Blocks to bring the floor closer
- Straps when your hands cannot comfortably reach
- Blankets for cushioning or support
- A chair for additional stability
For example, if you cannot reach the floor easily in a standing forward fold, try placing your hands on blocks. This helps you keep better control and avoid rounding your back or forcing the movement.
Developing Practitioner: Increase the Demand Gradually
Once you can perform foundational asanas with reasonable control, you can gradually increase the challenge.
You might work with:
- Longer holds
- Greater stability demands
- Gradually increased range of motion.
- More challenging transitions
- Fewer external supports when they are no longer necessary
The important word here is gradually. Don’t rush; take your time to build a solid base before moving into challenging poses, and use props whenever you need support.
More Experienced Practitioner: Add Complexity, Not Just Depth
As you gain experience, you can try more complex variations, poses that require more strength, longer holds, or harder transitions.
However, experience does not make every variation appropriate.
Your body type, current condition, past injuries, mobility, strength, and the demands of each pose still matter. Even someone with ten years of yoga experience might need to modify a pose on any given day.
Common Situations and Possible Modifications




