Learn How to Get Into Eight Angle Pose in 8 Simple Steps
Eight Angle Pose or Ashtavakrasana is an arm balancing pose that requires a certain amount of flexibility in the hamstrings, hips, and back. This arm balance pose also requires core and arm strength.
At the same time, keep in mind that this is a fairly stable yoga pose – it looks much more advanced than it actually is. If you can hold Low Plank (Chaturanga Dandasana) for 30 seconds, then you most likely have enough arm strength to practice this pose.
Before trying this pose, it’s important to warm up your body! Classical Sun Salutations (Surya Namaskars) are a perfect warm-up exercise. They activate the major muscles in your body and the muscles surrounding the spine and hips. Always remember that it’s important to properly warm-up before jumping right in. This will keep your practice – and your body – safe.
Practice These 4 Yoga Poses to Prepare for Eight Angle Pose
Once you have completed a few Sun Salutations, you can prepare for the Eight Angle Pose by first practising the poses below:
1. Side Plank (Vashishtasana)
You will challenge your mental and physical endurance by performing Side Plank, which strengthens your core, upper body, and arms while requiring deep concentration and it will prepare you for Eight Angle Pose by practising how to distribute your weight as you balance.
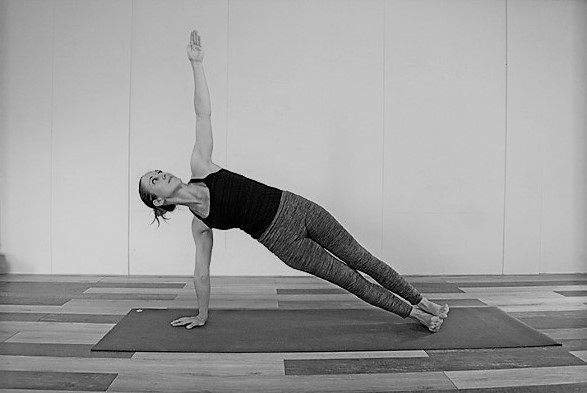
How to Practice Side Plank
- First, while in a high plank position have your wrists below your shoulders and your feet together
- Then place your left foot on top of the right. Support the weight of your body on your right hand and the knife-edge of your right foot. You can modify this position by staggering your left foot in front of the right for more support.
- Lift your left arm off the ground then rotate your body so that your left shoulder stacks on top of your right shoulder
- Extend the left arm towards the sky as you engage your core and draw your navel toward your spine. The more engaged you can keep your entire body, the easier it’ll be to hold this pose
- Find your balance in this pose and then find your gaze skyward – find your breathing in this pose.
- Hold for 20 seconds. Release the pose and repeat on the other side
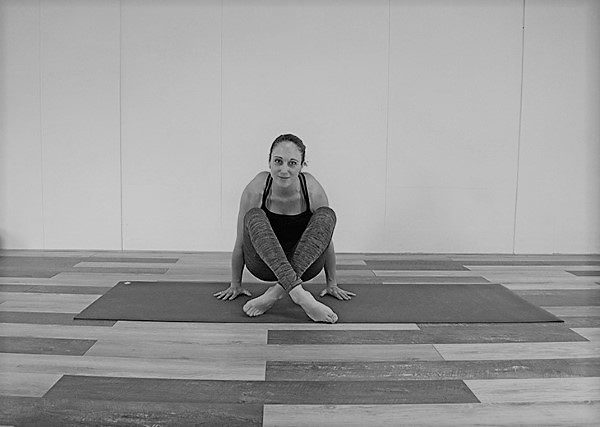
2. Turtle Pose (Kurmasana)
As a deep forward bend, Turtle Pose builds flexibility in the lower back, hips, and legs. This preparatory pose also cultivates the shoulder flexibility necessary for Eight Angle Pose.
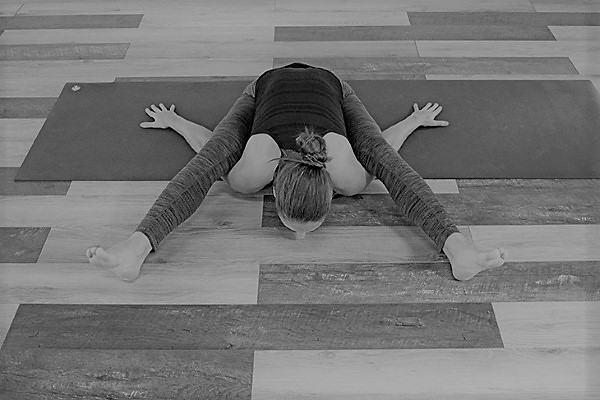
How to Practice Turtle Pose
- First, sit on your mat with your feet a little wider than hip-width distance
- Then, bend your knees. Place the soles of your feet on the floor
- Tilt the pelvis and fold forward from the hips
- One at a time, Slide the arm back and under your thighs with the palms facing down
- Push out through your heels to straighten your legs to the floor
- Reach with your chin towards the mat
- Now, to come out of the pose, slowly bend your legs and gently release your arms
Get a free copy of our illustrated e-book 4 Surya Namaskara Variations for Vinyasa Yoga
3. Easy Scale Pose (Sukha Tolasana)
Using Scale Pose as a preparatory pose for arm balance cultivates balance, core strength, and body awareness. In this pose, you should engage your core and use your hands to lift yourself off the floor.
Important Tip: Keep your hands active by firmly pressing them to the ground in Easy Scale Pose.
How to Practice Easy Scale Pose
- First, sit cross-legged and plant your palms next to your hips
- Then, root through the heel of each palm and actively press the fingertips into the mat
- As you breathe out, contract the abdominal muscles and press into your hands to lift your entire body off the mat
- Look straight ahead and hold for 10 seconds. It is important to breathe evenly and keep your shoulders relaxed down away from your ears
- Lower your body to the floor as you breathe out
4. Baby Cradle (Hindolasana)
Baby Cradle Pose is a deep external hip opener. It builds flexibility in the lower back. This makes it an effective preparatory pose for the Eight Angle pose.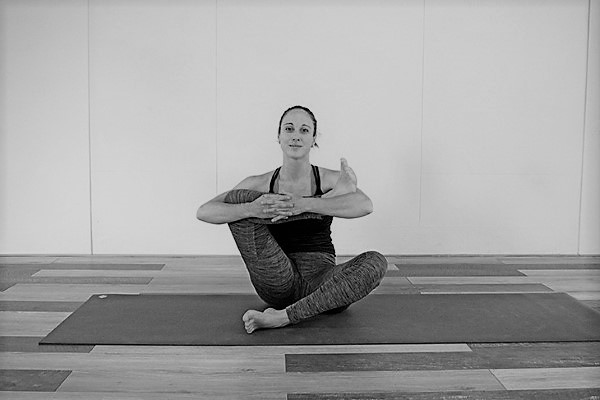
How to Practice Baby Cradle
- First, sit in a cross-legged position with your right leg on top
- Then, bring your right leg toward your chest. Place your right foot in the crease of your left elbow, and your right knee in the crease of your right elbow
- Your right shin is parallel to the ground. Bring it as close to your chest as you can
- Pull your belly button toward your spine. This protects the lower back and prevents the spine from rounding
- Hold the pose for 30 seconds then release and repeat on the other side
How to Practice Eight Angle Pose in 4 Steps
Now that you have practised these 4 preparatory poses you are ready to give the Eight Angle Pose. Here are four simple steps below to practice Astavakrasana!
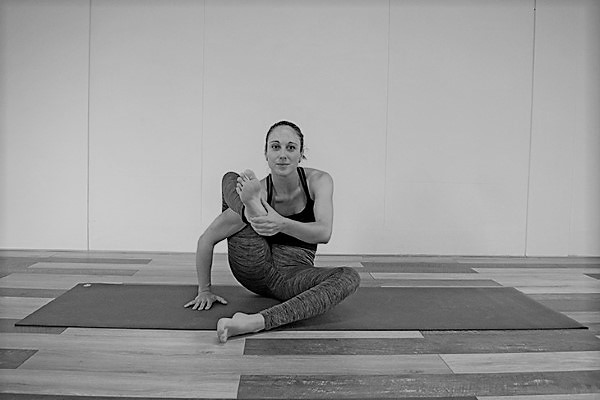
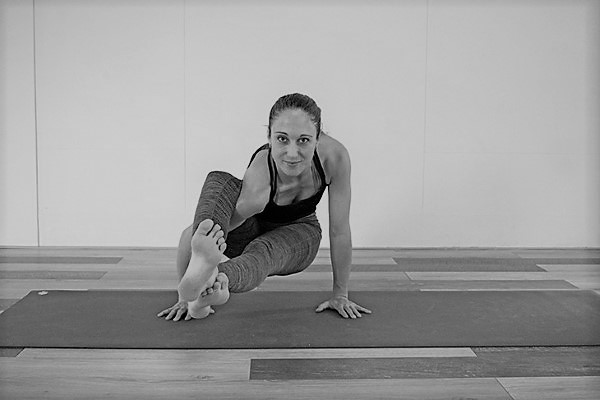
Step 1
- First, sit down with your legs extended directly in front of you
- Then, bend your right knee into your chest
- Bring your right arm to the inside of your bent right leg
- With your left hand, reach for your right foot or if you cannot reach your foot you can reach for your ankle
- Begin to snuggle the underside of your right knee behind your right shoulder
- Hook your right leg firmly behind the right shoulder. Keep the right foot engaged to help keep the leg in place
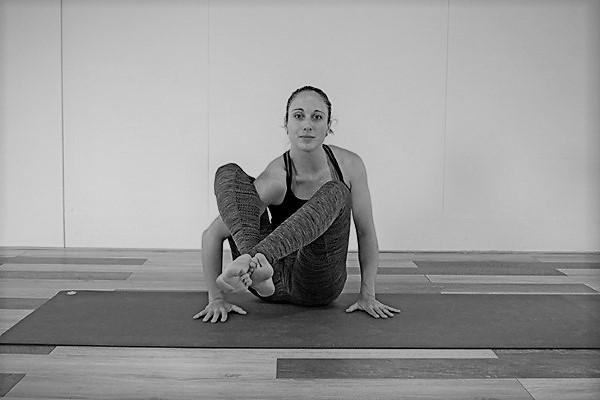
Step 2
- Place your palms next to your hips. Spread the fingers wide and keep the chest lifted
- Maintain hugging in of the right leg around the shoulder and keep the palms planted on the ground
- Pick up the left leg and lightly cross your left ankle over your right
Important: Hands should stay parallel with fingers facing forward and spread wide. You should actively push your palms, knuckles, and fingertips into the mat to build a strong foundation and protect your wrist.
Step 3
- Push your upper right leg towards the ground at the same time extending your feet forward, so your hips begin to lift off the floor
- Keep both feet flexed and ankles firmly locked as you begin to slowly straighten your legs
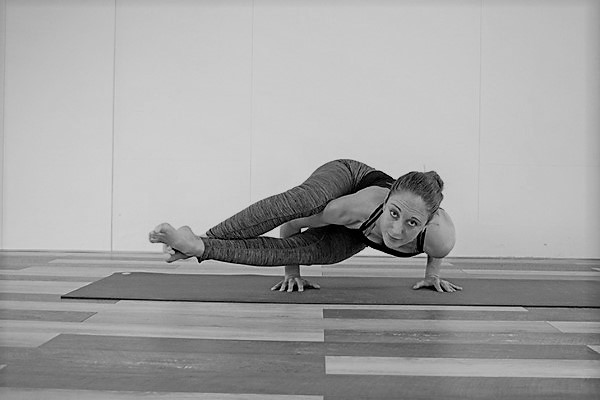
Step 4
- Now, bend your elbows to about 90 degrees. Think of that very action as in the Chaturanga push-up. Hinge your upper body forward but keep your chest and heart lifted
- Hug your left elbow in towards your waist. Engage the arms, core, and legs as much as possible to keep the body lifted.
Important Tip: Do not allow your shoulders to roll forward, and keep your gaze gently lifted without straining your neck.
Well done! Now relax for a moment and then give it a try to the other side.
The Benefits of Eight Angle Pose
Eight Angle Pose may look complicated but using the right preparatory poses, it can be easier than it looks! It is a powerful pose that builds a stable foundation and strengthens your wrists, arms, and core.
Eight Angle Pose builds strength in the wrists, arms, and core. It is also a great way to build confidence, improve concentration, improve digestion, and teach you how to surrender, wherever you are in your practice. Remember to always have a sense of humour (face plants are common with this one.) and embrace the process!
Also read: 10 Things you Need to Know about Headstands
Get a free copy of our illustrated e-book 4 Surya Namaskara Variations for Vinyasa Yoga