In my meditation classes, I often see students struggle to sit for longer periods because their knees hurt, their hips feel tight, or their backs begin to slump. In these situations, Swastikasana, a seated yoga pose, offers a stable, practical seat for meditation and pranayama.
What Is Swastikasana and Where Does It Come From?
The name Swastikasana comes from the Sanskrit words Svasti, associated with well-being, auspiciousness, or welfare, and āsana, meaning seat or posture. So, rather than referring only to the visual shape of the pose, the name points to the idea of an auspicious or beneficial seat.
You may also find Swastikasana in classical Hatha Yoga texts. The Hatha Yoga Pradipika describes it as a seated posture where the soles of the feet are placed between the opposite thighs and knees, with the body held upright. The Gheranda Samhita also includes Swastikasana among its postures, giving it a clear place in traditional yoga literature.
The word svastika has a much older Sanskrit and Indian cultural meaning than its modern associations may suggest. In this context, it relates to auspiciousness and well-being; therefore, you should understand the posture’s name through its Sanskrit meaning and traditional context, rather than through contemporary explanations of the symbol.
The Hatha Yoga Pradipika gives a simple description of this posture. It says to keep the body straight and to sit calmly. The main point is that Swastikasana is valued as a steady and comfortable seated position.
Keep in mind, you do not need to force your legs into a certain shape just because this is a traditional pose. The real goal is to find a stable and comfortable seat so you can meditate or practice pranayama without strain.
Related: 8 Seated Yoga Poses for Flexibility – A Step-by-Step Guide
How Is Swastikasana Performed Traditionally?
Traditional descriptions of Swastikasana are precise about foot placement, but they never focus on creating a visually perfect pose.
In practical terms, the traditional arrangement is:
- Sit on the floor and keep your legs extended in front of you.
- Cross your legs and bring your feet toward opposite sides of your body.
- Place each foot between the opposite thigh and calf, rather than stacking one foot on top of the other.
- Keep your hands relaxed in a comfortable position. Modern teaching often places them on the knees or thighs, though textual descriptions vary.
- Sit upright and balanced. Your spine should be naturally elongated, not stiff or forced straight.
The Gheranda Samhita gives a similar description, instructing the practitioner to place both soles between the thighs and calves and sit with the body straight. The Hatha Ratnavali also describes arranging the feet between the thighs and shanks while the practitioner sits upright.
How Swastikasana Differs from Other Seated Poses
Swastikasana is one of several traditional seated yoga postures, but its leg and foot placement differs from other familiar seated postures. Knowing these differences matters because modern yoga classes sometimes use the names generically, even though their traditional arrangement differs significantly. For example:
- Swastikasana: The legs are crossed, with each foot placed between the opposite thigh and calf.
- Sukhasana: A simple cross-legged sitting posture. It doesn’t always demand a specific arrangement of the feet and legs.
- Siddhasana: The heels are positioned close to the perineum, with the legs arranged in a more structured way.
- Padmasana: This instructs you to keep your feet on the opposite thigh, requiring considerably more hip mobility.
For meditation or pranayama, the best seat is not necessarily the most advanced. A posture that lets you remain upright, steady, and comfortable is usually more useful than one that forces your body into a deeper shape.
Also See: Standing Yoga Poses for Beginners to Build Strength, Balance & Confidence
What are the Primary Benefits of Swastikasana
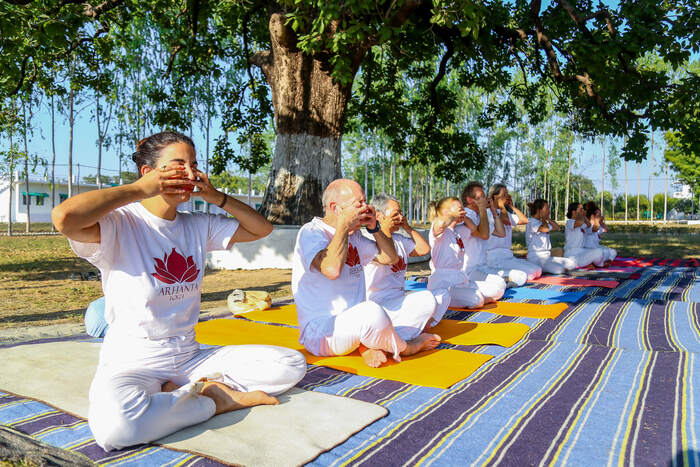
Provides a Stable Base for Meditation
When I guide my students through meditation, I often notice that distractions come from within. Even if someone looks settled, they might soon shift their leg, adjust their hips, or move their hands. Usually, this happens because their knees start to hurt.
A well-adjusted Swastikasana can reduce repeated movement by giving the body a more stable base. When the pelvis feels supported and the legs sit comfortably, the practitioner can stay seated steadily for longer.
This does not mean Swastikasana calms the mind or guarantees better meditation. Rather, a stable and comfortable seat can remove one source of physical distraction, giving the practitioner a better chance to keep full attention on the meditation practice.
Supports an Upright Seated Posture
Swastikasana can also help establish a balanced pelvis and spine. When the pelvis sits in a workable position, the spine can lengthen upward without the practitioner having to hold it rigidly.
Hip mobility plays an important role here. If the hips do not allow enough external rotation, a practitioner may compensate by tilting the pelvis backward and rounding the lower back. Sitting higher on a folded blanket or cushion can help you maintain a comfortable spinal position.
It is important to understand what the term “upright” means in this context. An upright spine does not have to look perfectly straight. The aim is not to flatten its natural curves or pull the shoulders aggressively backward. Instead, the practitioner should find enough length and support to sit without unnecessary muscular effort.
Provides a Comfortable Seat for Pranayama
Pranayama requires attention to the breath, and frequent postural adjustments can make that attention harder to maintain. Swastikasana can provide a steady seated position in which the head, neck, and torso remain relatively stable while the practitioner works with the breath.
The posture does not demand exceptional lung capacity. Its role is simpler: it provides a stable base for breathing practices with fewer physical interruptions.
For example, if a student keeps shifting because her knee feels uncomfortable, her attention moves repeatedly between breath and body. Adjusting the seat before pranayama can help avoid that disruption.
Encourage Stillness and Body Awareness
Remaining still in Swastikasana gives you time to notice what you might miss during movement. After settling into the posture, you can notice where you hold tension, whether one side feels different, and whether your body keeps trying to shift position.
This makes the posture useful not only as a seat but also as an opportunity for observation. A practitioner might notice:
- tension around the hips or shoulders
- differences between the left and right sides
- restlessness in the legs
- changes in breathing
- habitual adjustments of the pelvis or spine
The purpose is not to ignore these sensations and “sit through” them. Awareness means recognizing when your body needs a different setup or significant adjustments.
How to Practice Swastikasana: Step by Step
Step 1: Prepare Your Seat
Sit on your mat comfortably and keep your legs extended forward. If your pelvis rolls backward or your lower back rounds, sit on a folded blanket or firm cushion. Slightly raising the hips can give your pelvis more freedom to settle into a balanced position.
Step 2: Arrange the Legs
Twist one knee and bring the foot toward the opposite side, placing it between the opposite thigh and calf. Then bend your other knee and position the second foot in the corresponding space between the opposite thigh and calf.
Allow your knees to rest naturally. Do not push them toward the floor or pull your feet into position.
Step 3: Find a Balanced Pelvis
Check how your sitting bones connect with the support beneath you. If you feel yourself falling backward, raise your cushion or blanket. Your pelvis should feel stable so you do not need to constantly correct your position.
Step 4: Lengthen the Spine
From the pelvis, allow your spine to rise naturally. Relax your shoulders, keep your chin neutral, and let your head balance comfortably over your torso.
Think of creating length without rigidity. Avoid pulling the shoulders back or lifting the chest to the point of creating unnecessary tension.
Step 5: Place the Hands
Rest your hands on your thighs or knees, or use a mudra appropriate for your meditation or pranayama practice. Keep the fingers, wrists, and shoulders relaxed.
Step 6: Settle Into the Breath
Before you start your pranayama session, take a few natural breaths. Notice whether the torso, shoulders, and head remain relatively still while the breath moves comfortably.
If you find yourself shifting repeatedly, make the necessary adjustment before you begin the breathing practice.
Step 7: Stay and Observe
Remain in the posture as long as you can sit steadily without pain or persistent discomfort. Beginners can start with a short period and gradually extend it as the position becomes familiar.
If one leg feels more comfortable in front than the other, alternate which leg you cross on different days rather than always favoring the same side.
Note: Discomfort is a sign, not a test of flexibility. Sharp pain, persistent joint discomfort, or numbness can signal that you should come out of the posture and reassess your position.
Common Mistakes and How to Correct Them
Rounding the Lower Back
This often happens when your hips lack mobility, or you sit too low, causing the pelvis to roll backward. I advise my students to sit on a folded blanket to raise the hips slightly. This gives the pelvis more freedom to settle and makes it easier to keep the spine upright.
Forcing the Knees Down
Some students push their knees toward the floor because they associate a lower knee position with better flexibility. Let the knees settle at their natural height. Forcing them down can put unnecessary stress on the knee joint without improving the posture’s purpose.
Excessive Anterior Pelvic Tilt
Trying too hard to “sit straight” can create an exaggerated lower-back arch. Find a neutral pelvic position that allows the spine to rise naturally without excessive effort.
Collapsing the Chest
As your body tires, your chest may gradually sink, and your upper back may round. Lift gently through the sternum while keeping the ribs relaxed. You want enough support to stay upright, not a forced chest lift.
Pulling the Shoulders Back
I often see students overcorrect their posture by pulling their shoulders too far back. This creates unnecessary tension across the upper back and neck. Let the shoulders soften while maintaining length through the spine.
Pushing the Head Forward
If you try to lengthen the spine forcefully, it may move the head forward. Let your head balance naturally over your torso, and keep your chin neutral. This reduces unnecessary work in the neck.
Always Crossing the Same Leg in Front
You may notice that one leg feels more comfortable, so you prefer to repeat the same arrangement every time. I suggest you try a different approach. Alternate leg crosses in front between practices. This allows both sides to experience the posture rather than repeatedly favoring one pattern.
Staying Despite Knee Pain
I have heard many students say pain means progress. This is not true. Don’t treat knee pain as evidence that the posture is “working.” If you experience sharp or persistent discomfort, come out of the pose and reassess the leg position or use additional support. A meditation seat should make your practice more manageable and relaxing, not turn pain into something to endure.
Sitting Directly on a Hard Floor
A hard floor can make it difficult for some practitioners to position the pelvis comfortably. If you feel yourself rounding backward or struggling to stay upright, use the right props. Elevate your pelvis with a folded blanket or suitable cushion. Remember, the most useful correction is often the simplest one: change the setup before asking the body to work harder.
Related: 7 Beginner Yoga Mistakes I See as a Teacher (And How to Fix Them)
Modifications, Props and Variations by Level
For Beginners
If you are new to Swastikasana, begin with a simple cross-legged position, and if the floor feels uncomfortable or your lower back curves, sit on a folded blanket or meditation cushion.
Start with a brief period of sitting and then gradually lengthen it. The goal is to get used to the position while keeping the body relaxed so it can stay still.
For Limited Hip Mobility
If you have limited hip mobility, you may experience difficulty sitting upright with your legs crossed. Instead of forcing the knees closer to the floor, raise your sitting surface with a folded blanket, cushion, or bolster.
Elevating the pelvis can change the hip angle and reduce the tendency to compensate by rounding the lower back. A slightly higher seat makes it easier to maintain the posture without constantly readjusting.
For Knee Sensitivity
Prioritize knee comfort over achieving an impressive shape. Do not press your knees toward the floor or pull your feet into a position that causes joint discomfort.
In some cases, changing your foot position or raising the support under your pelvis may help. You can also put support under the knees so they don’t dangle.
If the discomfort stays or gets sharper or worse, then gradually get out of the posture.
For Longer Meditation Sessions
A posture that seems comfortable for five minutes will probably become uncomfortable after twenty, so if you’re doing longer meditation or pranayama sessions, it’s a good idea to use a higher meditation cushion or a firm bolster to keep your pelvis stable.
Others might also find it helpful to sit with their backs close to a wall. If discomfort increases, you can change your leg position or reposition your body for a short time, since this is more useful than staying completely still.
Alternating the Leg Cross
Notice which leg you naturally place in front. If you always cross your legs the same way, one side may start to feel more familiar than the other.
Try switching the leg you place in front from one practice to the next. This helps you experience the posture on both sides and notice if one position feels different or less comfortable.
When Should You Modify or Avoid Swastikasana?
Swastikasana is generally a simple seated posture, but that doesn’t mean it’s suitable in exactly the same way for every practitioner.
When to Modify the Posture
Consider modifying Swastikasana if you have:
- Knee pain or a past knee injury: Do not push your knees down. Adjust your leg position or use support as needed.
- Limited hip movement or hip discomfort: Try sitting on a higher surface instead of forcing your legs into a deeper cross-legged pose.
- Ankle pain or injury: Move your feet to a different position if your ankles feel tight or strained.
- If sitting on the floor is hard for you: Try using a cushion, folded blanket, or other support to raise your seat.
- If you’ve had recent lower-limb surgery: Follow your healthcare professional’s advice before returning to a cross-legged seated posture.
When Should You Stop?
Notice what you feel in your body instead of pushing through every sensation.
A gentle stretch in your hips is normal as you get comfortable in the pose. You might also feel some pressure as your body gets used to sitting on the floor.
However, sharp pain, growing joint pain, numbness, tingling, or ongoing discomfort are warning signs. If you feel any of these, come out of the pose and check your position instead of trying to stay in it.
If you have an injury, recent surgery, or ongoing joint problems, talk to a professional before using Swastikasana for long meditation or breathing practices.
Also See: How to Avoid Knee Pain & Injury in Yoga for Sensitive Knees
How Teachers Can Cue and Sequence It
When you teach a full class, watch how students respond to the posture, rather than expecting everyone to perform the same shape successfully.
Teaching Cues That Support Better Alignment
Keep your instructions short enough for students to follow while they are settling into the pose:
- “Elevate your seat if your pelvis rolls backward.” This gives your students a practical way to improve their seated position without forcing the spine upright.
- “Let the knees drop away naturally; don’t press them down.” The knees do not need to reach the floor for the posture to be effective.
- “Lengthen the spine without stiffening the back.” This encourages an upright position while allowing the spine to retain its natural curves.
- “Relax your shoulders and keep your torso upright.” Many students pull their shoulders back when they try to correct a rounded posture.
- “Find a position you can maintain without constant adjustment.” If your students keep shifting, check the setup before asking them to sit still.
How to Sequence Swastikasana
You may introduce Swastikasana at the beginning of class as a basic seated position, or later as a transition to pranayama and meditation. You don’t need to do a detailed warm-up each time. The warm-up should match what your students need that day.
A simple sequence can follow this progression:
Gentle movement → hip and ankle preparation → seated setup → Swastikasana → natural breath awareness → pranayama → meditation
Before asking students to sit, you might include a few gentle hip movements, ankle movements, Baddha Konasana, simple spinal movements, or a comfortable seated forward movement. These can help your students warm up the areas that tend to stay stiff.
For instance, if you notice that several students have difficulty keeping their pelvis upright, take a bit more time to prepare their hips or raise their seat. However, if the class is already comfortable sitting, there is no need to include a long sequence of preparatory movements just because Swastikasana is coming up next.
Once your students settle into the posture, give them a moment to observe their natural breathing before introducing pranayama. This allows them to notice whether the seat feels stable enough to support the next practice
Frequently Asked Questions About Swastikasana
What is Swastikasana used for?
Swastikasana is a seated yoga pose often used for meditation, pranayama, or any practice that needs a steady, upright position. It helps you sit calmly during meditation without putting too much strain on your legs.
Is Swastikasana good for meditation?
Yes, Swastikasana gives you a stable and comfortable base for meditation. It works well if you can sit upright without pain or needing to adjust often.
Can beginners practice Swastikasana?
Yes, beginners can try Swastikasana. Start with short sessions and use a folded blanket or cushion if you need extra height or support.
Is Swastikasana suitable for pranayama?
Yes. You can sit in Swastikasana for pranayama because it provides a relatively stable position for the head, neck, and torso.
What is the difference between Swastikasana and Sukhasana?
In Swastikasana, we place each foot between the opposite thigh and calf, following a more specific traditional setup. On the other hand, Sukhasana is a simpler cross-legged position with fewer rules about foot placement.
Why do my knees hurt in Swastikasana?
Knee pain can happen if your hips are tight and your knees have to work harder, or if you force your legs into place. Try raising your seat, changing your leg position, or putting support under your knees. Never push your knees down.
How long should you sit in Swastikasana?
There’s no set time that works for everyone. Begin with however long feels comfortable, and slowly increase it. If you feel sharp pain, numbness, tingling, or ongoing discomfort, come out of the pose.
Can I use a cushion for Swastikasana?
Yes, you can use a firm cushion, folded blanket, or meditation cushion to lift your hips and help you sit upright. Pick a height that supports your posture without causing strain.
Is Swastikasana better than Padmasana for meditation?
Not always. The best meditation seat depends on your body, comfort, stability, and the tradition you follow. Swastikasana might be better if Padmasana is uncomfortable.
Final Thoughts
Your meditation seat doesn’t have to look advanced. It just needs to give you enough stability and comfort to support your practice. If your knees hurt, your back keeps slumping, or you spend more time adjusting than meditating, it’s time to try a different posture.
Swastikasana isn’t valuable just because it looks simple or traditional. Its real value is in how well it gives you a comfortable seat for focus, breathwork, and stillness, especially when it’s adapted to fit you.
If you want to study asana, pranayama, and meditation with Indian teachers in a traditional ashram-like environment, you can explore our 200-Hour Yoga Teacher Training in India to develop a deeper understanding of both yoga practice and teaching.




